For this bracelet you have to know four knots, the larks head, the vertical larks head, the square knot and the wrapped knot clasp. Even though I'm calling this hemp jewelry, cotton or jute cord will work just as well.
This bracelet starts in the middle. Every hemp style jewelry tutorial I’ve ever seen starts at one end and works down to the other. That drives me crazy because if I’m trying to center a focal point, I’ll find I made the first half either too long or too short. Also because each knot is dependent on the previous one, if I decide to make a design change I have to start all over. The only caveat I’ve found starting from the middle is having to mind that you keep your work centered on the holding cords when pulling the knots tight. Using a clipboard to hold things in place once the first few knots are done takes care of this issue.
You will need:
2 – 14 inch holding cords (shown in yellow)
2- 44 inch 10 lb. cords (shown in brown)
2 – 44 inch 20 lb. cords (shown in blue)
1 skull bead
2-8 4mm round beads (optional)
bead reamer (optional)
Craft glue
E6000 glue
Small sharp scissors
Big eye needle
First apply a thin coat of craft glue to the ends of the 44 inch cords, this keeps them from fraying and helps when stringing beads.

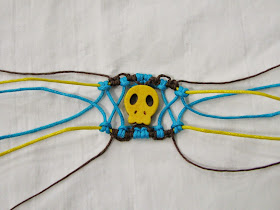
Use the center of one of the blue cords to create a larks head knot in the middle of one of the yellow holding cords.

Make a vertical larks head knot right beside it. Repeat these two steps with the remaining blue and yellow cords and set aside.

At about the center of one of the brown cord make a larks head knot beside the two blue ones.
Then with the same brown cords make another vertical larks head knot beside it, but this time we want the end to point in the other direction.
 |
| Start by going under the yellow cord |
 |
| ...then over... |
 |
| ...then under again... |
 |
| ...and then pull it through. |

Repeat these steps for the other brown cord on the other side.

Arrange the two holding cords so the blue cord ends are facing each other.

Thread both the brown cords through the skull bead.

Create vertical larks head knots with the brown cords on the outside of the blue knots on the bottom yellow cord mirroring the top cord.

Place another vertical larks head knot with each end of the blue cords next to the brown knots on the same side.

On the outside place a vertical larks head knot with the end of each brown cord.

Now you can start to cross the blue cords still using the vertical larks head, but on the opposite side. At any time after this point you can add beads. If the bead hole is a little tight, you can widen it using a bead reamer. I've also had a lot of success with just trimming the cord end at a steep angle and stiffening it with a little more glue.
Add another set of knots with the brown cords on the outside. Then cross the blue cords again, this time pulling them just a little closer. Then repeat with the brown, cross the blues and pull them just a little closer than last time, so you get that curve around the skull.

Keep alternating brown cords on the outside and crossing blue cords on the inside.
Once you get close to the desired length follow the last brown larks head knots with a series of square knots using the brown cord.

When the brown cord is almost all the way through, add a little E600 to the cord still sticking out and then finish pulling it all the way through. Also add a little E600 where the ends come out. Once dried you can trim off the ends of the brown cord.
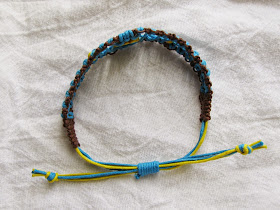
Knot the remaining strands together on either end 3-4 inches out. Cross the ends and secure them with the wrapped knot clasp.
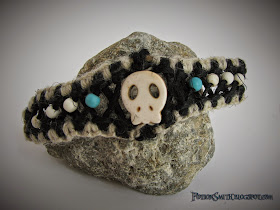
Then tada! You have a creepy cool skull bracelet.
Stay tuned for Skull Hemp Jewelry Series: Round 3 - La Calavera Catrina Pendant


No comments:
Post a Comment