Sunday, July 28, 2013

Delightfully Twisted Artwork

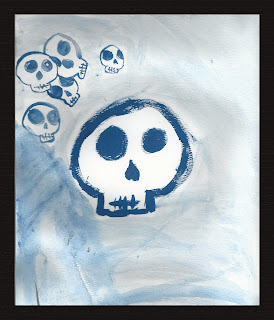
I purchased this brilliant skull painting from a young, up and coming local artist.

My daughter and her friend decided to have a sidewalk sale of their original watercolor paintings to benefit the Humane Society. My girl did the skulls just for me because she knew it would be an easy sale. Both of them did an incredible job planning, painting and setting up.

Their other works weren't nearly so dark, but I count myself lucky to have snatched up her friend's painting that I like to call "Not a Fan", because she said it's not a fan, it's abstract.  (But I can still see it spinning and the breeze blowing, which is a little weird if it's not a fan.)

I almost missed the big annual art fair downtown, which would've been a travesty. Not only were most of my favorite artists there, but I saw quite a few others for the first time that already I can't wait to see again and I came home with some amazing artwork.  I thought I'd share the artists that appeal to my warped nature.

HJMetalsmith.com - I love the creepy cool bugs, especially the praying mantis, but I can admit I also like the pretty butterflies and flowers.

Wagalabagala.com - I could get lost in the worlds he creates and am slowly amassing a collection so I can do just that.

MelvinMcgee.com - "Blue Band" is one of my favorites, it's like a mix of Blue Man Group and Dr. Seuss. "Alien Ark" is another one I just had to have. I love the brilliant colors, the humor and the out of this world experience his paintings give me. 

Juliadams.com - She had me with Memento Mobile a few years ago and I've been back for more every year since. 

ArtByTai.com - I liked his mutated Boba Fett, but it was the mixed media version of his frog grenade that I fell instantly in love with.  I didn't think it could get better than a zippered frog with Born to Kill sketched on his Kevlar, but it was aptly titled Full Metal Frog: Apocalypse Amphibian, which was the icing on the cake for me.

Eslingergallery.com - I love the eerie twists on my childhood icons. The Cheshire cat and the Grinch were always creepy, but it's like he's removed that thin veneer that kept us safe and sane. 

Atomic7studio.com - The wall of painted decks at his booth caught my eye. I've always felt like I'm walking into an art exhibit when I enter a skate shop and for a moment it was as if the reverse was true and then I was swept in by everything else he has to offer.

MadTatters.com - I love the 3D skull art and the paintings are fabulous.  You have to click on the blog link to see "Not a Sparrow Will Fall" by Ellie Rusinova

StanleyScott.com - Very dark, I really loved the ones that made me feel like I was walking into a metal vortex.

Dolangeiman.com - I love this SeƱorita. She was even more stunning in person.

EricHazeltineart.wordpress.com - He wasn't at the fair this year, but I saw him last year and hope to see him again.  I love his beautiful skull work. 

Monday, July 22, 2013

Toilet Paper Roll Mummy

This is my toilet paper roll mummy.
There are many like it, but this one is mine.

The two things that I've added that I don't see on most others is a rounded head and stable base.

For this mummy you will need:

Thin cardboard (cereal box)
White craft foam sheet
Toilet paper roll
Paper towels
Googly eyes (15mm)

Printer
Scissors
Glue
Tape (clear or white)


The first thing to do is cut strips.  For this I used paper towels, but you could use anything whitish and pliable that can be cut into strips.  Cheesecloth, muslin or old white T-shirts would all work well.

I like the Bounty select-a-size.  Each sheet is 11x6 inches.  You will need 4-5 of these cut into four strips each.  After the strips are cut crumple them into little balls to give them a little more texture.


Feet Template
 

Then make a template for the feet. You can skip this step if you're only making one, but you'll want to make more, so just make the template.

Just to make sure the scale is right, when printed the feet should measure 3 inches across the widest point.


Glue a rough cut of the template onto the cardboard and then cut along the outside edge of the line when it's dry.
 
If you plan on using this for a craft party and don't want someone gluing the template to their project thinking they found a pair of feet already cut out or for the template to accidentally get tossed during cleanup write "TEMPLATE" on it.  I speak from experience.
 
Then trace your template onto the white foam. 

 
 Cover the foam with a thin layer of strips. Tear them into smaller pieces, leave parts of them crumpled and twisted, but make sure all the folds are glued down well. After it dries trim around the edges. 

 
While waiting for the feet to dry, make the mummy body. Start with a toilet paper roll.  I prefer the brown ones, but if yours are white you might want to use paint or construction paper to darken a face area.  Create an "X" across one end of the roll with tape. Then loosely crumple 3 sheets of the aforementioned paper towels.  If yours are a different size or thickness you'll have to adjust. 
 
 
Gently stuff the tube with paper towels, until just a little dome sticks out the top.  This will be the mummy's head. Create another "X" over the dome with tape.


Lay a strip across the top of the mummy's head. Then cross another strip over the first, not quite perpendicular, so that you leave some room for the face. This lays down a nice layer of white, to build on. 
 
 
Next gently tie a strip around the middle of the tube to hold them in place. Then tie two more, one at the bottom and one at the top, staggering the ties so it's not all bulky on one side.  The reason I tie instead of glue is to be able to move things around.  Make sure the two strips from the previous step are where you want them and push them aside near the top to create a face area. 
 
 
To lay down the strips put a little dab of glue where you want to start and then just wrap them around every which way. Twisted, crumpled and messy gives it more character.  I use a dab of glue at the ends, maybe one in the middle, but I don't glue too much until I'm done.  Then I make my final adjustments and add glue anywhere that needs it.    The last step is to add the googly eyes and glue the body onto the foot base. 
 
Below are a few variations we've come up with using scraps of this and that. The bats were made by the kids in preschool. I have not made TP bats, but when I do I'll use the body style shown at Filth Wizardry.


Tuesday, July 2, 2013

Death Om Nom

 
The next addition in the Twisted Om Nom's is Death.   I don't draw much, almost never because I find it frustrating.  My abilities and my aspirations don't exactly see eye to eye.  I realize I'll never improve with that attitude, so these Om Nom's are my scary adventure outside of my comfort zone.  With each one I find out just how much I don't know, like how to draw draping cloth, but it's fun trying. If you've seen my  Sugar Skull Bunnies then you know I just recently discovered the world of converting sketches to line art following the basics of this video.  Death is my first attempt at trying to use the inking technique that's demonstrated in the video.  I think it does give the lines more character. I'm not sure how much I'll use it, but again it's fun trying new things. And here's one for you to color. 
 

My favorite Death is from Terry Pratchett’s Discworld series.  This is a great chart of how all the Discworld books are laid out.

My second favorite Death is from Neil Gaiman’s Sandman series.
I can’t mention the Grim Reaper without writing about my son’s brush with Death. Last fall one of the state parks hosted a night hike.  Little did we know as we set off, how close we would come to Death that evening. But on our way back to the main shelter we saw Him. Lurking amongst the groups of hikers, He never mingled or spoke a word, just silently skulked around the fringes.  No matter how hard people, however unwisely, tried to engage Him, He never broke character.
My son had taken a seat atop one of the picnic tables, when I notice Death approaching behind him.  Death sat down next to him and although my son started when he saw who his new bench mate was, he didn’t say a word.  He just scooted over a bit and then so did Death.  My son gave him a look as if to say, “What the heck?”, but still he remain silent and scooted over a bit more and Death followed. And that’s how it went with two silent figures in the dark, one inching closer each time the other moved away, and I the only witness to this seated dance with Death. Until, “Whumph!” Death and I looked over to see two feet sticking up in the air, my son had scooted right off the edge of the table.  Death looked momentarily surprised in so much as one can looked surprised behind a cloth mask. When my son's head popped up and we could tell he was alright, Death let out a bellowing laugh that shook his entire hulking form.  

Some may claim to have laughed in the face of Death, but so far as I know my son is the only person to have made Death laugh. 
This was also the same Death that inspired my daughter to get a costume last year, which she used for Creepmas and she aspires to be Little Death on the next hike.