Showing posts with label bats. Show all posts

Tuesday, November 24, 2020

Boa Bats Revisited

One of the things I've been doing during Covid is going through my craft stash and either finally finishing projects or donating things I'm never going to use.  

I really like these adorable boa bats, and had the best of intentions to create a whole colony of them.  So I stocked up on supplies and then procrastinated for years because as much as I like them, I despise cutting things out more.  

I posted about these guys one Creepmas because I have a cute bunch of these that are all snowy white just for that occasion.  I had a new idea for making these and went back to that post to find the original source and it doesn't exist anymore.  

Luckily I still had the templates I made from the original source, so I didn't have to create my own design.   The original craft sported three different style of wings, although I wasn't crazy about the other two, I really like this shape.  

My updated method of making these bats is to print out the wings, rough cut around them and then glue them onto felt (or foam) sheets with glue sticks.  The glue doesn't hold well, so after cutting on the lines the paper peels right off.  Shown is a standard* piece of 9x12 felt.  That's also a common size for foam sheets.  

*Standard when you live in a country that still uses inches.  It's roughly equivalent to 23x30cm.  


The wings from large to extra small vary by 10% in size.  The following two sets of wings can be printed on 8.5x11 paper.  


To assemble, wrap a feather boa around the middle of the bat wings.  How many wraps really depends on the thickness of the boa and how plump you want your bats.  For thick feather boa's I wrap twice for the larger sized wings and once for the smaller.  If I wasn't such a disaster with hot glue, I'd probably use that.  But I am a disaster, so I use Aleene's Fast Grab Tacky Glue.  I have to hold it in for about a minute to set.  

I use a clear beading line, similar to fishing line, to hang them, one on each end.  I string it through the loop created by the boa body. This also helps if there is more than one boa wrap to keep them together, because of this I usually wait until after I do this step to add the eyes.   


The line is clear plastic and slippery.  I'm sure there's probably a fancy knot to securely use it, but I don't know what that is.  Instead I use a small 1mm crimp bead, which just as the name suggests is a small metal bead that you can flatten with a pliers to secure. 

For less floppy wings you can use foam sheets or stiffen felt.  I don't mind floppy wings and my absolute favorite is using textured felt.  


I'm going to hold myself accountable to finishing off a few more batches of bats before the end of the year and then I can consider myself to be sufficiently batty.   So here's two ideas I had that I will not be trying out, but I'll share in case you'd like to make more work for yourself:  Needle felting wool roving into bone ridges on the wings.  Cutting two wings per bat and sandwiching wire or pipe cleaners in-between to make the wings poseable.  

Sunday, April 19, 2020

Creepmas Came Early...

…or at least that's what it feels like.  Last week Lady M expressed interest in my pandemic masks and one does not want to disappoint the mistress of The Haunted Parlor.   By way of thank you, she has gifted me a box full of goodies!  Thank you Lady M for putting a smile on my face!

I am now the proud recipient of one of Lady M's coveted miniature Ouija boards.  So much detail in a thing so tiny, it's amazing.  I can't wait to start summoning micro demons.


And more of her laser work, bats...


…and witches & webs.  The webs are so incredibly thin and beautiful. 
It almost looks like quilled paper but with the sturdiness of wood.  


The lovely bones...

I'll have to think of something fabulous to do with all of these but you can see all the cool stuff she's done at the Haunted Parlor.  A few of my favorite posts are here, here, and here.


Also included in the mix, these tiny little potion bottles.


Pretty little bat earrings.  


And these cool skulls.

And there's still more.  It all came in this custom Haunted Parlor box, covered in vintage newspaper, where they can all reside while I'm waiting for my brain to kick in with creativity. I love the skeleton hand!


There are lot's of interesting ads and articles.  A reminder this is not our first rodeo...

Not sure if ice cream would even be the first thing anyone recovering from Covid19 would want, but all the local ice cream shops are closed anyway.  Which is a shame because the Chocolate Shoppe makes Exhausted Parent (bourbon-spiked espresso ice cream swirled with bittersweet chocolate chunks), that I'm sure everyone, not just parents could appreciate right now.


As an adult I generally pass on ice cream unless it's coffee flavored, that seems to balance out the sweet for me, although I occasionally indulge in Babcock's orange custard chocolate chip. Now as a kid, and up until my late twenties, it was always blue moon, which I didn't realize was a regional delicacy until I was older. 

Even though it's not my favorite thing, at this moment the simple indulgence of going out for ice cream would be heavenly.  Is it too much to hope Covid19 decides to take the summer off?    

Monday, January 6, 2020

Creepmas Cookies


I said I was going to try making Yeti cookies and I did, but it wasn't quite the effort I put into the Krampus ones. The kids had their cookies to decorate and I had to make some "normal" ones, so there wasn't a lot left for me to play with. To be a honest my Yeti's are kind of a bust, but I have high hopes of doing better next year. I do like the one in the middle, he turned out pretty cute. For him I used an upside-down snowman cookie cutter.


I tried some mouth/tongues similar to the Krampus with rolled out gumdrops and black sugar. The horns are peppermint candy corns. The center Yeti's nose is a piece of Buncha Crunch, which is a nugget of Nestle's Crunch. If you have low expectations for peppermint candy corns, these will meet those expectations. They also infuse the Buncha Crunch with their lackluster peppermint flavor. But boy do they make cute little festive horns.


Here are some of the kid's cookies, upper right is a gingerbread man bleeding from multiple stab wounds, below that is a Death Snowflake, the candy corn being it's death ray and the skulls and tombstone representing the number of planets it has destroyed. At the very bottom with a candy corn tie is a mobster snowman, and above him is a vampire snowbat with candy corn fangs. They might taste like minty crap, but those candy corns sure are versatile.


Next year I plan on making more ghosts, I like how he turned out with the black skulls for facial features. The coffin on the left is my second one, definitely an improvement compared to the one on the right. Word of advice don't try to edge a coffin in one continuous band of frosting, it almost looks like a flipflop.


Second word of advice, less is more when it comes to color. 
I like the Creepmas garland, but I should have made it with fewer colors.


This was going to be a Yeti and somehow it ended up as an angry Yule goat. 
I think I need more of these next year too.


And more unicorn snowbat creatures, with bone arms.


I thought these bats were cute too.


And just to play fair I made holly with a bat cookie.
It would probably look more like holly if I had bothered to make green frosting. 

I used my usual recipe for the cookies and frosting. I don't believe I've ever made buttercream frosting in advance, but time constraints necessitated it this year. I just let it come to room temp and whipped it again before using. It was kind of nice not having the mess of making frosting on top of the mess of decorating cookies, I don't know why I've never done this before.

Another thing I liked this year, and maybe this has been around for a while and I'm just finally noticing, was the little $1 packets of holiday sprinkles at Michaels. It was nice buying a variety of holiday cheer in reasonable amounts that will get used up in the next two years. 

Friday, November 11, 2016

Craft Party 2016


This October marked the 9th year of official Halloween craft parties. It's a lot of crazy, but magic happens when you throw a bunch of people in with a bunch of stuff, stir in some glue and sprinkle on a little glitter.  I love seeing everyone feed off each others ideas. It's like being in a vortex of creative energy.

Sadly I didn't get pictures of everything.  I never do, there's so much happening at once, it's hard for me to keep up.

As we do every year, there were potion bottles.  Bottles with labels...

Both this poison label and the one in the first picture are from SpookShows.com. Life Renewal Potion label from Love Manor.

bottles without...


The bottle below is one of my favorites, staring at the line between the light and dark red was like looking off into the horizon of a red alien landscape. 
Someone said it looked like a core sample from Mars. 


Last year we discovered that if you add glitter to a bottle of water
with a little oil in it the glitter sticks to the oil and takes on
a globular life of it's own when you shake it around. 


This bottle is kind of neat because there is too much glitter for the oil to hold,
so it has both the globular effect and loose glitter falling down when shaken. 


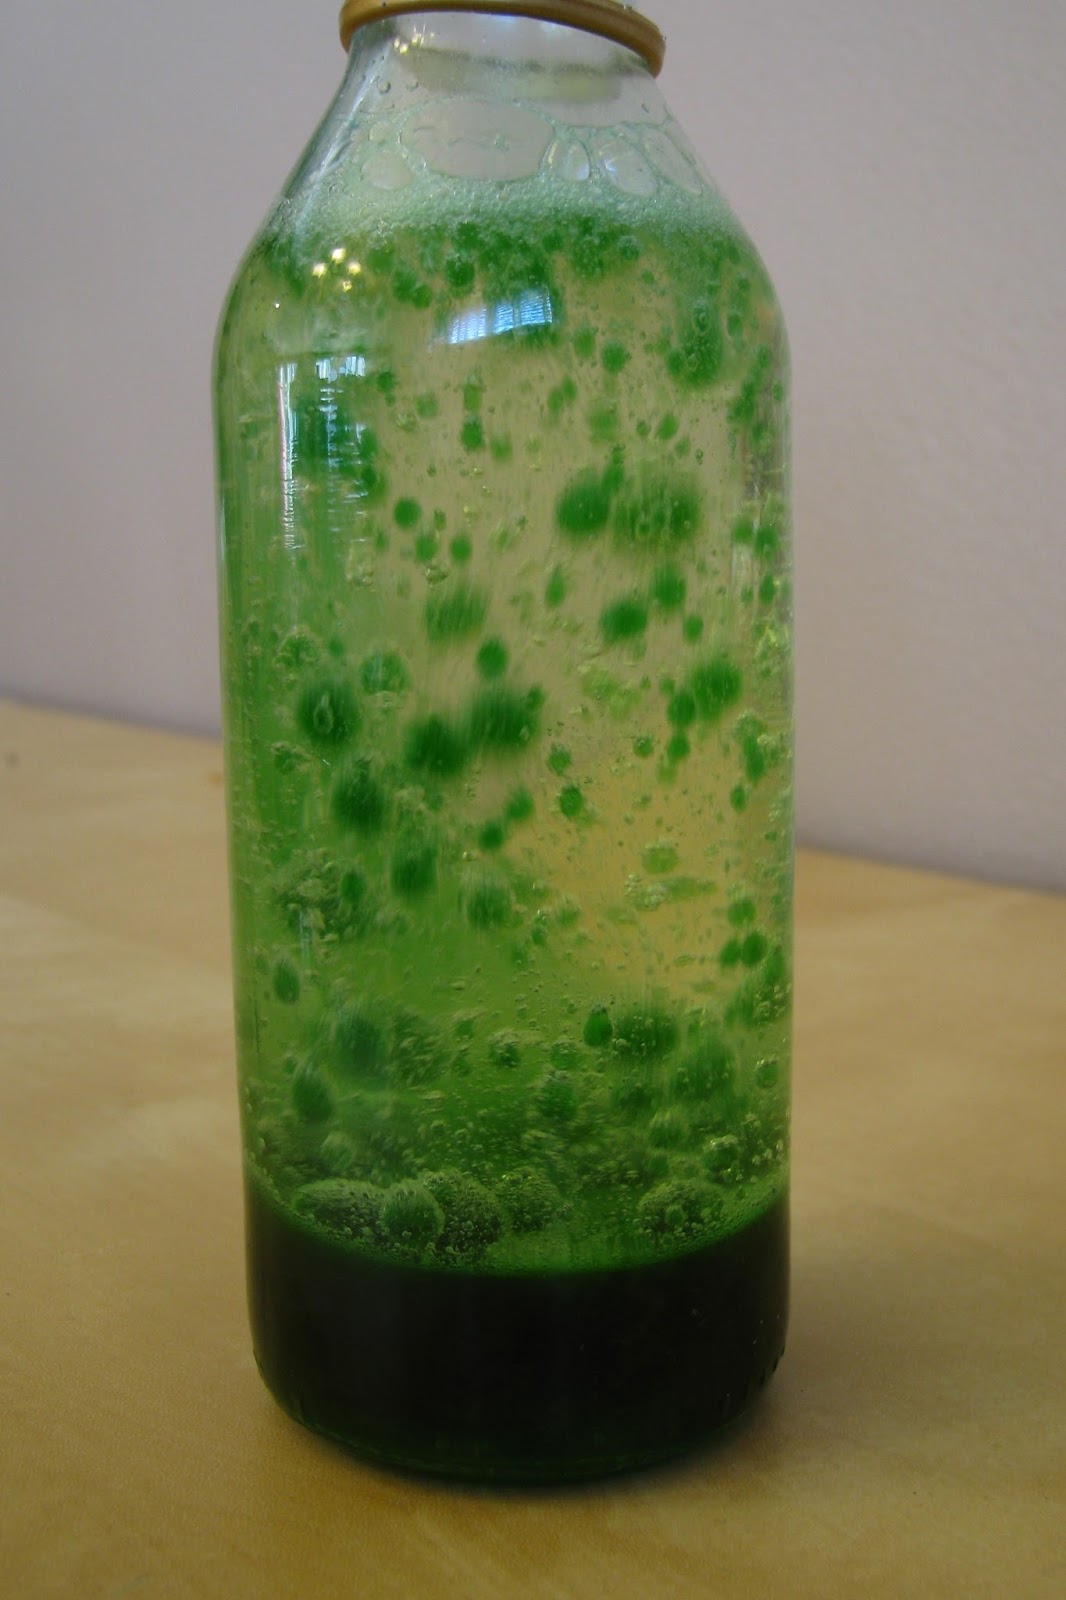
We also did lava lamp style bottles, which are a lot of oil
and a little water with alka seltzer tablets thrown in.
I wouldn't recommend adding glitter to these, it ruins the effect.


We used both corn oil and baby oil. 
Corn oil is cheaper, but yellow and baby oil is clear.

This one is pretty as is, but I wish I had a picture of when it was just plain water,
baby oil and silver glitter.  It almost looked like a storm cloud in a bottle. 


This year I made vampire blood.  Which is super cool, green under normal light, but glows red under UV. I used kale as they did in the instructions, but it's noted that anything green and leafy should work.

I have never eaten kale and after this I probably never will. Just blanching it for a minute smelled really bad, like old broccoli and even after pureeing the crap out of it the solid matter was really fibrous. It was not attractive. I'm just mentioning this in case you think you're going to tempt kids over to the dark side of kale by showing them how "cool" it is.  Cool, it is.  Edible, I think not. 


Anyway moving on, what to do with it? I tried lighting the "blood" from within with a submersible UV tea light.  It needed to be watered down so much for the light to come through that the effect is pretty blah.  Pictured above is full strength vamp blood on the left and watered down on the right, being lit from a source outside the containers. It's just a little strobe UV light, so it was hard getting a good picture. 


I kept the fibrous muck after I strained it out, because that stuff is cool too.  The chunky stuff isn't as bright, but this picture still doesn't do it justice. After it dried, it glow a bit less, but still enough to look cool.  Once it dried it didn't stink, it smelled a lot like alfalfa.


You can write or draw with the liquid and that looks cool too, but I don't have pictures.  Again it fades as it dries.  Maybe mixing with an acrylic glaze would help? Definitely need to experiment more. Like these glowing cupcakes from PhotoandGrime.com that use the chlorophyll from mint. Betcha mint smells better than kale.  I wonder if you can make minty vamp blood mojitos? Ok I definitely have to get down to the laboratory.  Igor? Where's an Igor when you need one?


I've been wanting to do papier mache at the party for awhile, but that's not a project that can be finished in a few hours.  So as a compromise, just to get some techniques introduced, we did simple stuff that people could at least get the foundation laid and then paint it on their own once it was dried. Here are some fantastic books my neighbor did. 

Here's a cute little pumpkin and some eyes before painting. Both are done on pieces of cardboard.  The eyes are glass gems over iris printouts from Orestesgraphics.com


And some random glass gems over magazine cutouts. 


I've been wanting to make tampon ghosts for ages, but the kids were so young I held off.  You can't really traumatize them if they don't get the joke.  But now that most them are in middle school, I figure the only thing worse than going through puberty would be tampon crafting with your mom. 

Tampons and I go way back, to when I was in middle school.  You know when dinosaurs roamed the earth and mullets and parachute pants were cool. In all that time I never noticed that they are made up of a bunch of really short fibers that fall apart when you futz with them. It may be unnecessary but I spray them with a little starch for longevity.  A clear acrylic spray would probably work well too. If you would like to read more about tampon construction than you ever really wanted to know check out my tampon angel.

I didn't want to add spraying starch as a parlor game inside my house, so for the party we just dipped them in starch.  A little liquid goes along way, so quick dips. My friend had the genius idea to wet the ends with the watered down glitter glue we had for potion bottles and then took it one step further to drop food coloring on the bottoms and let it wick up. Next time I would skip the starch and go straight to the watery glitter glue or maybe brush starch on the top and glitter glue the bottoms. 


I was inspired by her ghosts to make this tampon Cthulhu,
which I will write up a tutorial for, because everyone should
have a super absorbent Great Old One in their life.


The past few years voodoo dolls have been a party favorite. 
The girls love making fashionable outfits for them, so when I saw these ladies at Grandin Road, I thought we could do a similar thing with mini skeletons.


 They came up with some pretty amazing ideas. 


I was inspired to make this last skeleton while cleaning up after the party.  Scraps of this and that were laid out in such a way that the universe was practically begging for this to be made.  I started off with every intention of making a punk skeleton, but the scraps of pink neon lightning material (I have a friend who makes skate costumes, among other things, who donated some really neat stuff.), had other ideas and wouldn't leave me alone until I resigned to go 80's glam rock.

She's missing an arm because pre-party I played around with posing.  Soaking in boiling hot water was ok for minor manipulation. Snapping joints off and gluing into position looked the best, but leaves the joints very vulnerable, which is fine if you aren't going to mess with it much.  Obviously I messed too much and lost limbs along the way.      


We also made box mummies inspired by these but on a smaller scale.
Even though they look very similar we did things differently enough that I'll write up a separate tutorial. 


We did more foam bats this year too. 
Add a wire and you can stick them with your plants. 


We also made witch jars and other silhouette luminaries. 
No pictures but last year's post has pictures and links to silhouettes we used.


Food.  I'm obligated on penalty of death or at least torture by being tied to the tree of woe and licked by fire kittens to make rat and eyeballs every year. 
This year I went with diseased rat.  He did a fantastic job of oozing raspberry blood, I was very pleased.


I also made cookie dough brains, making the full cookie dough recipe without the cupcakes resulted in about 40 dough balls, which took about 16oz of white chocolate to coat enough molds.  These numbers are approximate because my kitchen is infested with ninja trolls that steal dough balls when I'm not looking. I made intestines, another recipe I'll have to post, and I tried these jalapeno mummy poppers, with a few modifications.  Instead of scallions and garlic, I seasoned them with chipotle powder and instead of salt & pepper I used a chipotle sea salt blend. The jalapeno's were a nice balance to all the sweet stuff. 


Guest contributions included Bat Barf, a meaty queso dip.  I didn't get a picture, but it was very barfy looking.  I did snap a picture of the tag, which makes me giggle, like only emoji barf can do.


On the sweeter side there were eyeballs,


bones,


witches hats and broomsticks,


graveyard cupcakes,


acorns,


and candy corn.


There's also a part that no one else gets to see. When the party's done, when it's quiet, when I can finally process everything...that's when I get some of the best ideas and I owe them all to the wonderful people who choose to share this day with me.