Showing posts with label papier mache. Show all posts

Thursday, August 15, 2019

Witch Finger Coffin


In the coffin is a witch's finger.  The only clue to who she was is the picture on the front, courtesy of the Graphics Fairy by the way.

This is one of those projects that's been a decade in the making.  I made this finger ages ago during a Girl Scout outing.  The girls earned their pottery badge at a place that uses a wood fired kiln, which was pretty cool to learn about.

While the girls were making their pottery, I spotted this discarded little log of clay.  I can't take much credit for making this finger, because it was practically a finger before I even picked it up.  I formed the nail bed and added the fingernail and a few knuckle lines, but that's it.  I painted it with acrylics after firing.


All this time I've had this finger, waiting for inspiration to strike with a creative way to display it.

The coffin was an after Halloween clearance purchase.  It wasn't very exciting, so the first step was to fancy it up. I found this video and this video by Sage Reynolds on how to line a box with padded velvet to be very useful.  It's definitely worth a run through even if you do like I did and not pad the liner.  Also at some point you are going to want to paint the inside of the coffin.  I suggest using a color similar to your fabric to hide any tiny gaps or imperfections in the finished lining. My fabric was a clearance priced remnant.


Trace the outside of box on paper and then measure in the thickness of the sides to figure out the inside dimension. From there measure out the height of the sides to create the tabs.  I used paper first, to make a template.  It's easier to make adjustments on paper. Keep in mind you do have to make some allowances for the thickness of your final insert and fabric.  I used a cereal box and a thin fabric.  I scored the cardboard so the sides folded up easily.  


Test your insert, trim as needed.  You want it to fit nicely, but not too tight, you'll need room for the width of the fabric.  At the corners where the sides meet you should have just enough gap to accommodate your fabric.  Again mine was thin, so I trimmed just a hair's breadth.


Cut a piece of fabric the size of the insert and glue it down. I normally only use Elmers school glue for papier mache because it's too watery for much else.  Here it's thin consistency was an asset. I was able to apply a very thin, even coat on the insert and the fabric laid across it perfectly smooth.

Once that's dry you can trim around the insert, make sure you leave enough fabric to fold over the edges. I used double-sided sticky tape to keep the folded edges in place.


My liner ended up fitting perfectly snug, so I didn't glue it down. Also I'm fickle and might want to try my hand at a padded liner at some later date. Repeat the above process to line the lid of the coffin.

The next step is to add some dimension to the top of lid. Below is the template I created. This is actually the fourth one I made before I was happy with it. Again working with paper first is a lot easier to fine tune your template.


The red line "B" is the outline of my coffin.  It's important that it's outlined exactly the way it will sit on the top of the coffin. Until I started this process I would've sworn the coffin was symmetrical.  It's not even close.  

The inside line labeled "A" is 3/8 inch in from the red line. 
The outside line "C" is 1/8 inch from the red line. 
The little red lines "D" are drawn perpendicular to lines "B" from the corners. I've denoted the right angles in blue.  
The little black lines "E" are drawn from the corners of line "A" to the points where lines "D" intersect lines "C".  
Cut along lines "C" and "E".  
When you cut out the final piece on cardboard also score along lines "A".  
I hope this all makes sense.     


Tape the corners together and try the template on for size. After I knew these were the exact measurements for the shape I wanted, I went through the whole process on a piece of cardboard instead of tracing the template for a more precise fit.  


To make it a little sturdier I stacked and glued craft sticks, broken to fit down the center underneath. I put glue around the edges and used tape to keep it in place.  After it dries you can papier mache over it.  I chose texture past under a layer of lace, which I scored on my last thrift store excursion.  I may have gone a bit overboard on the decorations, but I stand by creating a raised lid.  It's a nice addition to an otherwise plain cheap coffin.  


The original plan was to do raised scrolls in texture paste, somehow that ended up being random zipper swirls. I daubed a thin texture paste in between the zippers to make the plain cardboard more interesting.  Then I slapped on two coats of black paint, wiping it off the zipper teeth so the metal shines through.  I was going to highlight the different textures, but I thought it would look too busy.  They don't show as well in the pictures, but in person the textures speak for themselves.    


We have a charity thrift store in town where you pay by the pound.  Basically all the stuff that doesn't sell at their main outlets goes there.  All the clothes are in these huge bins that you have to shift through.  I went there years ago with a friend looking for clothing with interesting zippers/buttons. One of the workers kindly pointed out that we were sifting through bins that had been picked over for awhile and pointed where the "newer" stuff was.  Since we were going to destroy anything we bought, it was actually nice to know that we were sifting through the rejects of the rejects.  I didn't spend much and I still haven't used all the items I salvaged.  If you have anything like that in your area I'd check it out.

Monday, November 6, 2017

Altered Potion Bottles


I'm obsessed with altered bottles.  I blame the Russians.  I got sucked in by their pinterest Postila.ru which led me to Stranamasterov.ru  According to Google Translate it is:  Country of Masters - a site about applied creativity for children and adults: crafts from various materials with their own hands, master classes, competitions.

The variations of bottles is endless and I want to make all the bottles with everything.  As I mentioned in my craft party post you can use anything to decorate these bottles, the hardest part is choosing what. Before the party my daughter and I each created a bottle using different items and techniques to use as examples.

The bottle above is my daughters creation. She worked too fast for me to get before and after pictures.  She started with a layer of Mod Podge and tissue paper.  Our city recycling program can't accept tissue paper, so I always save it for projects like this.  She chose to hot glue her items on.  She used twine, beaded garland, and broken jewelry; bit of chain, charms and links.  There are faux pearls, some wavy bits that are pieces of shell and of course smaller whole shells.  There is a bit of mesh packing paper, which has some neat texture. She used fabrics and even some vinyl from a repair kit which also had some interesting textures. Most items where attached before painting, but you can see some were added after for a pop of color.

I had seen bottles like this using dried plants and was curious to see how that would actually work.  I also wasn't sure what medium they were using to set the plants into.  After reading through a few translated how-to's I decided to go with a mixture of Elmer's white glue and spackle.  I added a little glue at a time until the spackle was the consistency I wanted.

First I started with a layer of Mod Podged tissue paper to give the spackle mixture a better surface to cling to.  After the tissue paper was dry I added a rough layer of the spackle gunk with a tongue depressor  and started pressing things into it.  I used twine, dried ornamental grass, wood beads and the seeds my hamster doesn't like from her treat mix.  Towards the end I stuck on a glass gem with a skull picture from the previous craft party to try and show how those could be incorporated too.  It doesn't really work here, and looks every bit the last minute add-on that it is, but it's still a valid idea.  Next time I would  make the gem the focal and work the design around that.  I would also build up the medium more around the gem.


I love how a sloppy application of spackle adds interest to the surface of the bottle.  Being able to set things into it makes them part of the bottle as opposed to merely laying on top. The downside is the longer drying time.  I let my dry overnight before painting.  Gluing items worked better for the craft party, but if you have the time, the spackle method is certainly rewarding.

Wednesday, October 18, 2017

Modifed Ouija Planchette


Recently my daughter and her friends have begun dabbling in the occult.  Maybe I should be concerned about hell and damnation, but I'm just happy to see them put their phones away.  By some miracle they either don't know there are Ouija apps or they don't care.  If I had known all a board game needed was a little mysticism to attract this kind of attention, I would've claimed my Pente board had divination powers.  I just might try that yet.

For a while they used a Ouija board made out of paper and cardboard.  But we are now officially owners of an overpriced piece of chipboard and a hunk of plastic.

I was a little disappointed that it didn't come with any ominous rules, the girls already knew all the basics, but it still would have been fun to see them in print.  On the back of the box it does give some cheesy examples of what to ask, "Will my parents let me go to the concert? What should I wear?"  That's where I put my foot down and told them under no uncertain terms were they going to open a portal to hell just to find out what they should wear.

The board isn't horrible.  It's pretty sturdy, the graphics are still the William Fuld design.  The planchette on the other hand is the most boring shade of beige plastic imaginable. Probably the only kind of spirit you could attract with it would be one that would want to do your tax returns.  I guess that wouldn't be so bad, unless being on the other side of the veil transposes numbers, then you'd have a hard time explaining that one to the IRS.

Well I decided no daughter of mine was going summon malevolent spirits or be possessed by evil demons using institutional beige accessories.

First step is to remove the clear plastic piece.  Cover the planchette with Mod Podge, but not inside the ring.  Then add a single layer of tissue paper.  Notice I laid it right across the opening. Apply Mod Podge to outside edges of the planchette and fold the tissue over it.  Gently pat it all down.  You can pull the excess tissue paper off along the wet edge.


Design and make embellishments.  I won't lie. This part actually took me a while, which is a little ridiculous when the end product was a fairly simple design. But I changed my mind about a billion times before I got there. So I have this whole slew of twisted wire bits to adorn bottles at the next craft party.  All wire bits were hammered between two metal blocks. Just enough to make sure they would lay flat not enough to flatten the wire itself.


I used 18 gauge wire, but you could use a thin cord or small metal filigrees. I've even seen where people make awesome swirly designs with hot glue, although all I can do with a glue gun is make gloppy messes with lots of stringies.  The eye is from one of the local craft stores, but I can't remember which one. It came on a strand with five more just like it.

Glue the pieces in place and let dry.


I covered everything with Mod Podge except for the now covered opening, and the eye charm.  Again I used a single layer of tissue paper, covering everything including the eye.  I applied more Mod Podge and added on more lay one more layer, making sure to push into all the crevices around the wire and around the edge of the eye charm.  I slit the paper covering the eye and pushed it down around the eye piece. I added a small piece of tissue paper above and below the eye to flesh it out a little more and coated it in Mod Podge.

Once it was dry I trimmed around ring to make sure there was no tissue paper in the opening, otherwise the clear plastic piece wont fit. I painted it all black, including the inner ring and underneath.  After that dried I sponged on dark brown and metallics in brown, copper and gold. Any paint that I got on the eyeball I wiped off with a damp clean paintbrush.

Aside from me spending way more time than I should have making a few wire curlicues, this was a quick project and ended up looking way cool.  I'm sure all the really cool spirits will be hanging out at our house.

"My Ouija brings all the souls to the yard,
 And they're like, its better than yours,
 Damn right, its better than yours..."

...sorry, been spending too much time around teens lately.  

I also bought my daughter Ouija Board Nightmares: Terrifying True Tales.  It starts with a little mysterious history of the Ouija board, but it's mostly very short urban legend type stories.  There were quite a few stories about kids at sleepovers or parties just messing around with the Ouija and then...So absolutely perfect for the target audience at our abode.

Maybe they'll get into tarot cards next.  I would love to have a set of these Twin Peaks cards.

Friday, November 18, 2016

Punk Skeleton Vulture


Punks Not Dead, well maybe a little decomposed. 
If you've been following along, after the craft party I meant to make a punk skeleton and ended up going glam rock.  Not to be denied my desire for punk and bones I channeled all that energy on this guy. 

Here he is before his transformation, which consisted mainly of
tissue paper, paint, feathers, a few beads and pieces of an old belt. 


This is from behind obviously. 


And here he is with a pumpkin I got on sale at the beginning of October,
which probably has a lot to do with my mindset this season. 

Friday, November 11, 2016

Craft Party 2016


This October marked the 9th year of official Halloween craft parties. It's a lot of crazy, but magic happens when you throw a bunch of people in with a bunch of stuff, stir in some glue and sprinkle on a little glitter.  I love seeing everyone feed off each others ideas. It's like being in a vortex of creative energy.

Sadly I didn't get pictures of everything.  I never do, there's so much happening at once, it's hard for me to keep up.

As we do every year, there were potion bottles.  Bottles with labels...

Both this poison label and the one in the first picture are from SpookShows.com. Life Renewal Potion label from Love Manor.

bottles without...


The bottle below is one of my favorites, staring at the line between the light and dark red was like looking off into the horizon of a red alien landscape. 
Someone said it looked like a core sample from Mars. 


Last year we discovered that if you add glitter to a bottle of water
with a little oil in it the glitter sticks to the oil and takes on
a globular life of it's own when you shake it around. 


This bottle is kind of neat because there is too much glitter for the oil to hold,
so it has both the globular effect and loose glitter falling down when shaken. 


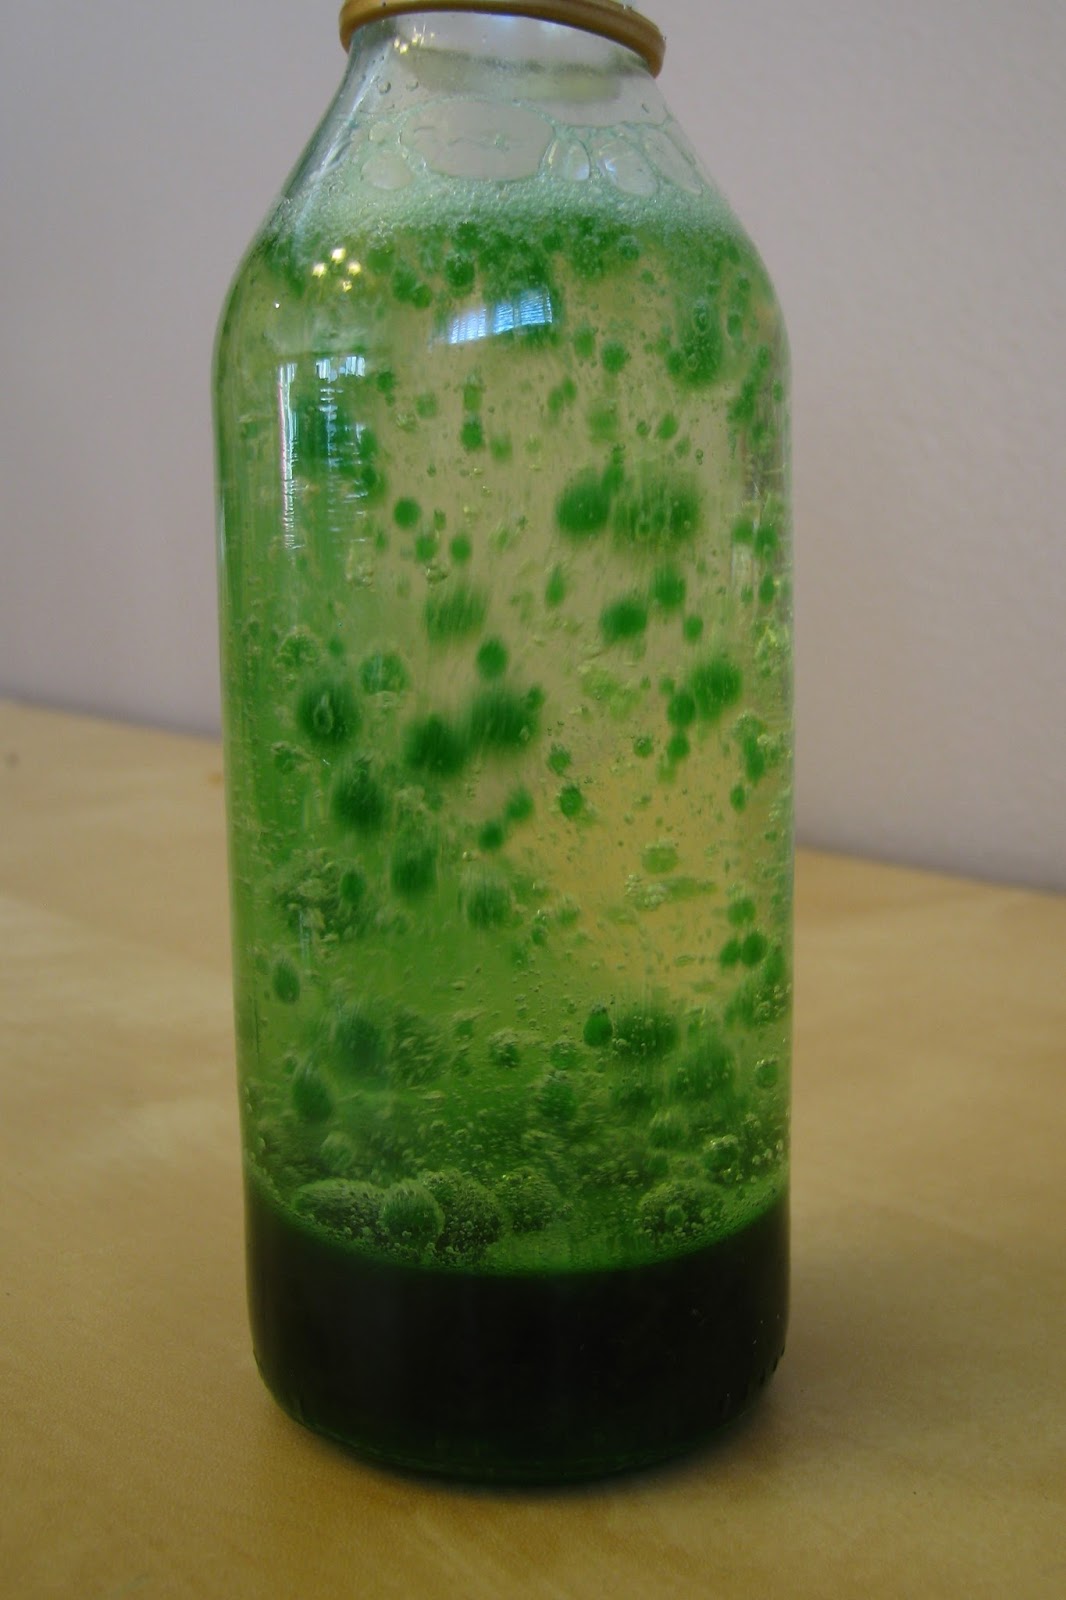
We also did lava lamp style bottles, which are a lot of oil
and a little water with alka seltzer tablets thrown in.
I wouldn't recommend adding glitter to these, it ruins the effect.


We used both corn oil and baby oil. 
Corn oil is cheaper, but yellow and baby oil is clear.

This one is pretty as is, but I wish I had a picture of when it was just plain water,
baby oil and silver glitter.  It almost looked like a storm cloud in a bottle. 


This year I made vampire blood.  Which is super cool, green under normal light, but glows red under UV. I used kale as they did in the instructions, but it's noted that anything green and leafy should work.

I have never eaten kale and after this I probably never will. Just blanching it for a minute smelled really bad, like old broccoli and even after pureeing the crap out of it the solid matter was really fibrous. It was not attractive. I'm just mentioning this in case you think you're going to tempt kids over to the dark side of kale by showing them how "cool" it is.  Cool, it is.  Edible, I think not. 


Anyway moving on, what to do with it? I tried lighting the "blood" from within with a submersible UV tea light.  It needed to be watered down so much for the light to come through that the effect is pretty blah.  Pictured above is full strength vamp blood on the left and watered down on the right, being lit from a source outside the containers. It's just a little strobe UV light, so it was hard getting a good picture. 


I kept the fibrous muck after I strained it out, because that stuff is cool too.  The chunky stuff isn't as bright, but this picture still doesn't do it justice. After it dried, it glow a bit less, but still enough to look cool.  Once it dried it didn't stink, it smelled a lot like alfalfa.


You can write or draw with the liquid and that looks cool too, but I don't have pictures.  Again it fades as it dries.  Maybe mixing with an acrylic glaze would help? Definitely need to experiment more. Like these glowing cupcakes from PhotoandGrime.com that use the chlorophyll from mint. Betcha mint smells better than kale.  I wonder if you can make minty vamp blood mojitos? Ok I definitely have to get down to the laboratory.  Igor? Where's an Igor when you need one?


I've been wanting to do papier mache at the party for awhile, but that's not a project that can be finished in a few hours.  So as a compromise, just to get some techniques introduced, we did simple stuff that people could at least get the foundation laid and then paint it on their own once it was dried. Here are some fantastic books my neighbor did. 

Here's a cute little pumpkin and some eyes before painting. Both are done on pieces of cardboard.  The eyes are glass gems over iris printouts from Orestesgraphics.com


And some random glass gems over magazine cutouts. 


I've been wanting to make tampon ghosts for ages, but the kids were so young I held off.  You can't really traumatize them if they don't get the joke.  But now that most them are in middle school, I figure the only thing worse than going through puberty would be tampon crafting with your mom. 

Tampons and I go way back, to when I was in middle school.  You know when dinosaurs roamed the earth and mullets and parachute pants were cool. In all that time I never noticed that they are made up of a bunch of really short fibers that fall apart when you futz with them. It may be unnecessary but I spray them with a little starch for longevity.  A clear acrylic spray would probably work well too. If you would like to read more about tampon construction than you ever really wanted to know check out my tampon angel.

I didn't want to add spraying starch as a parlor game inside my house, so for the party we just dipped them in starch.  A little liquid goes along way, so quick dips. My friend had the genius idea to wet the ends with the watered down glitter glue we had for potion bottles and then took it one step further to drop food coloring on the bottoms and let it wick up. Next time I would skip the starch and go straight to the watery glitter glue or maybe brush starch on the top and glitter glue the bottoms. 


I was inspired by her ghosts to make this tampon Cthulhu,
which I will write up a tutorial for, because everyone should
have a super absorbent Great Old One in their life.


The past few years voodoo dolls have been a party favorite. 
The girls love making fashionable outfits for them, so when I saw these ladies at Grandin Road, I thought we could do a similar thing with mini skeletons.


 They came up with some pretty amazing ideas. 


I was inspired to make this last skeleton while cleaning up after the party.  Scraps of this and that were laid out in such a way that the universe was practically begging for this to be made.  I started off with every intention of making a punk skeleton, but the scraps of pink neon lightning material (I have a friend who makes skate costumes, among other things, who donated some really neat stuff.), had other ideas and wouldn't leave me alone until I resigned to go 80's glam rock.

She's missing an arm because pre-party I played around with posing.  Soaking in boiling hot water was ok for minor manipulation. Snapping joints off and gluing into position looked the best, but leaves the joints very vulnerable, which is fine if you aren't going to mess with it much.  Obviously I messed too much and lost limbs along the way.      


We also made box mummies inspired by these but on a smaller scale.
Even though they look very similar we did things differently enough that I'll write up a separate tutorial. 


We did more foam bats this year too. 
Add a wire and you can stick them with your plants. 


We also made witch jars and other silhouette luminaries
No pictures but last year's post has pictures and links to silhouettes we used.


Food.  I'm obligated on penalty of death or at least torture by being tied to the tree of woe and licked by fire kittens to make rat and eyeballs every year. 
This year I went with diseased rat.  He did a fantastic job of oozing raspberry blood, I was very pleased.


I also made cookie dough brains, making the full cookie dough recipe without the cupcakes resulted in about 40 dough balls, which took about 16oz of white chocolate to coat enough molds.  These numbers are approximate because my kitchen is infested with ninja trolls that steal dough balls when I'm not looking. I made intestines, another recipe I'll have to post, and I tried these jalapeno mummy poppers, with a few modifications.  Instead of scallions and garlic, I seasoned them with chipotle powder and instead of salt & pepper I used a chipotle sea salt blend. The jalapeno's were a nice balance to all the sweet stuff. 


Guest contributions included Bat Barf, a meaty queso dip.  I didn't get a picture, but it was very barfy looking.  I did snap a picture of the tag, which makes me giggle, like only emoji barf can do.


On the sweeter side there were eyeballs,


bones,


witches hats and broomsticks,


graveyard cupcakes,


acorns,


and candy corn.


There's also a part that no one else gets to see. When the party's done, when it's quiet, when I can finally process everything...that's when I get some of the best ideas and I owe them all to the wonderful people who choose to share this day with me.