Showing posts with label brains. Show all posts

Wednesday, July 3, 2019

Zombie Jesus & Bunny Brains


Not that I was trying to make good on my threat to do Easter in July, but my little buddy here didn't get finished until after Easter and then summer showed up and if I don't post about him now, I'll forget by next Easter.

Since we're talking about Easter, I finally got around to watching the second season of Happy! and it is to Easter what season one was to Christmas.  It is so wrong, and bound to become a Creepster holiday classic.  It's Rated TV WTF: Weird Situations, Tasteful Nudity, F***ed Up Bunnies, Viewer Discretion Is Advised.  And the trailer below, it's a bit graphic, so you know, probably don't watch it if you have kiddies or co-workers around.


I know that no amount of palm weaving tutorials are going to keep me from going to hell and I'm ok with that.  I grew up in a very Catholic family, which as you can probably tell, has had some influence on my art. As a kid I accepted all that was Easter, from the resurrection of Christ to the magical rabbit that hid eggs and put treats in baskets.  As an adult, I'm just in awe that we celebrated all that crazy wrapped up in one holiday without anyone batting an eye.

As tribute to the holiday mash up of my childhood,
 I offer Zombie Jesus Eating Bunny Brains.


I don't really do tutorials on felting, once the stabbing starts it's hard to stop and take pictures. But I'll run through the basics on the off chance it gives someone ideas of their own.  For reference Zombie Jesus is about 8cm tall.  He started out as a white oblong sphere.  I added a layer of zombie green over the top for his head.

Zombie green is a mix of olive, sage, green, evergreen, or whatever else I feel like throwing in.  Except for black and white, I rarely ever use just one color of wool.  The red robe, brown hair, pink brain are all a mix of at least three different shades.  Even the bunny is a mix of yellow and white.

Because A) I like to think it looks more interesting, B) I like buying multi color sample packs from local vendors, so I have small amounts of lots of colors C) It takes a lot longer to run out of specific colors and D) When I do run out of a color, I never worry about having to buy an exact match.

The robe I added in sections.  This would be easier to explain in pictures, but I'll give it a shot.  When I want a thick straight edge, such as the bottom and sides of his robe, I lay down some wool flat and give it a few shallow pokes to set the fibers.  Then I fold over an edge and give it some more shallow pokes. Shallow pokes because you are trying not to poke the fibers all the way through.  It can't be helped completely and that's why it'll need to be flipped, given a few more pokes and then flipped back again, more pokes.  At this point you can set it on your object and poke with abandon to attach it.  I just did this for the sides of the robe and filled in the rest by laying wool directly on his little body.


The white washed Christ of my youth always had burgundy robes and long brown hair. A friend let me raid her stash of Merino wool for his luxurious locks.  Merino has a smoother shaft, and I like it for fur or hair.  

This video shows how to layer wool for long fur.  It's pretty close to what I did  except I did way too many rows, too close together.  I wish I had taken a picture so you could see what Zombie Jesus looked like when he had big beauty pageant hair.  

It was pretty easy to fix, I ran an eyebrow comb repeatedly through his hair to thin it out.  The tines on the eyebrow comb are fine enough to grab the wool, I just had to be careful to thin it out evenly and not pull out any big sections. Then I gave him a haircut with cuticle scissors, which have never even seen a cuticle, but I love them for needle felting.  

The following is a quick and dirty brain felting technique that I came up with on the fly.  Sometimes I get a little too caught up in the details and I did not want to stress over proper placement of brain ridges on this teeny tiny brain.  This method enabled me to avoid the part of my brain that makes me mental.

I imagine the first part of this process is similar to spinning wool into yarn. That is if you were to ignore all the time tested techniques that result in a strong uniform yarn.  Like I said, quick and dirty.


Step 1:  Lay wool fibers out in a line and roll back and forth until you have some that resembles a loose string.  Add more fibers to the ends to make it longer, add more fibers to the entire length to make it thicker.  I use some pretty hi-tech equipment for this, namely my hand and my thigh.  Also wearing pants helps the process.  That's right, in a seated position I roll the wool up and down the top of my thigh.  Pants provide a grippy surface to work the wool against.

Step 2:  Once the fibers are matted enough that the string isn't going to fall apart, start twisting it one direction.  Twist tightly enough that it twists up on itself.  To tame all the loose fuzzies you will have to do this a few times, stretching out the string and twisting it tighter. If you want it really smooth you can dip it in soapy water and then twist, essentially wet felting it.  If you decide to get it wet, make sure it's completely dry before moving to the next step.


Step 3:  Spread out the brain matter and lay a bit of darker wool over it.  Poke it a couple of times to tack it to the brain.


Step 4: Roll the brain matter into a little brain ball around the darker wool.  Poke it a few more times so the brain ball stays together.  Then poke it a couple more times, just for the shear joy of stabbing a brain ball.


This bunny was kind of a pain.  I feel it's a bit too large in proportion to Zombie Jesus, but still small enough to give me a headache.  His dastardly tiny limbs and ear were difficult to needle felt without stabbing through the other side or my fingers.  After I needle felted them into the general size and shape, I dipped them in soapy water and rolled (limbs) and pressed (ear) to wet felt them.  This gave them structural strength without drawing too much blood.  

[Note: All crafts require a blood sacrifice, as demanded by the gods.  Some, such as needle felting, just require more than others.]

After the bunny was assembled I used my trusty cuticle scissors to cut open his little head, partly insert the brain and then stab it into place. A fine needle was used to poke in any stray dark red fibers and then some bunny flesh was built up around the brain.  After all my careful work my brain still wasn't perfect, there was a low spot.  That was easily filled with a little tiny ball of pink and no one is the wiser, except for us of course.


Is it just me or from this angle does it look like Zombie Jesus is breastfeeding a dead bunny?  Maybe he just likes to slow dance with his food.  Anyway, the final touches were to add a face to the bunny and arms so Zombie Jesus could hold his feast.

Of course none of this helps me understand why a rabbit would decorate eggs. But I think I figured out how the Easter Bunny manages to fill all those baskets in one night.  I mean Santa gets magical flying reindeer and a sleigh to carry everything while the Easter Bunny has to hop the whole way and doesn't even have opposable thumbs. But Jesus is just a baby on Christmas Eve, he doesn't even have his super powers to turn water into wine yet, so Santa needs all that extra gear.  On the other hand by Easter, Jesus is an able bodied zombie and he can totally give the Easter Bunny a hand.  Not only that, but by then he has his super powers, and they probably only have to carry one basket of goodies and just duplicate it fish and bread style.

Now that I understand it all, I feel a little bad about having Zombie Jesus eat a bunny brain.  But he looks so cute eating his little bunny brain.  

Saturday, August 18, 2018

Tortured Textures

I'm gearing up for the annual Halloween craft party.  This year the main focus will be the mixed media altered bottles we started to touch on last year.  I say bottles, but really these techniques can be applied to any surface.  


I recently stumbled on Maremi SmallArt.  I've watched a couple of her videos on different methods of creating texture and a couple on creating art with junk you might have laying around.  Her videos are quite long and chatty, but very entertaining and informative.  She's like the Bob Ross of mixed media.  For someone like me who isn't very outwardly expressive it's almost cathartic listening to her. Not to mention all that joy is conveyed with the coolest accent, although being from the Midwest I think pretty much everyone who doesn't sound like me has a cool accent.  The videos I watched were long, but she covers a lot of ground quickly and efficiently.

There's one thing she said about creating art in one of her video's that I absolutely adore, "Be spontaneous. Be fearless." Alright, enough about Marta. But you won't be disappointed if you check out her channel.

One of things I loved about her texture videos (Ok I'm not done talking about her.), is she used the cardboard backing from packaging as her base.  I've been trying out different things on full projects, like twine & seeds, eggshells, plastic bugs, flowers & buttons and molded pieces.  It's been a slow process.  Watching her I realized how wonderful it could be to do smaller projects and try a bunch of textures in a short amount of time.

For my base I used countertop samples from almost two decades ago.  Can we say hoarder? When we were picking out countertops I couldn't decide and I have so many samples but I couldn't just throw them away.  I used some to make a faux floor for a pumpkin years ago but otherwise nothing has come of them.  For this I used the blank side of the samples as my canvas. Everything is painted with a layer of flat black and highlighted in champagne gold. I kept them very simple and only used items I already had.


My first texture comes from embossed tinfoil.  Using texture paste with stencils has been on my list of things to try.  So when I saw this neat stencil on clearance I figured now was the time.  Except it's not a stencil it's an embossing folder.  I didn't know such a thing existed, but now I have one.

The image is raised on one side and depressed on the other, so that when the folder is closed they nest together.  A piece of paper is placed in the folder and normally pressed with a little machine and then you have a nice imprinted design.  If you don't have a little machine you can use a rolling pin and a little muscle.

The thicker the paper the more effort required but tinfoil takes almost no effort at all.  I do recommend tearing the tinfoil into the sizes you want prior to pressing.  The other way around and you will press out the design with your fingers wherever you hold it to tear.


On the left we have a base layer of tea bag with pieces of embossed tinfoil depressed side up.  The right is a layer of tissue paper topped with embossed tinfoil with the raised side up.


And this is what they look like with stuff glued on.  Glass half marbles over pictures from a GrandinRoad magazine*, a bit of cheesecloth, a bottle cap, and a piece of scrap wire randomly twisted and lightly hammered flat.

*I admit I ordered their magazine just for the pictures, but they do have some cool stuff.  They also have some items that look like overpriced cheaply made knock-off's of stuff other crafters have done, but all the big kids are doing that these days. I did end up buying a half dozen skeleton mice from them last year, so I guess it does pay to advertise.  I got a really good deal on them after Halloween.  I bought the mice to use as rats since they are more rat size, whereas I think their rats are miniature Chihuahua sized. 
   

This is me painting already attached cheesecloth black.  I painted it flat on parchment paper, so I wouldn't get paint on the glass and after it was dried I wrapped it around the edges of the glass.  I thought this in-between moment was kind of mini work of art on it's own and worth keeping in mind to recreate something similar in the future.  


I liked the texture of these napkins and wanted see how they held up after painting.  I do like how they turned out, even though I'm a little disappointed that as different as the napkins looked, after painting I can't tell which is which.  


And here are the finished projects:


On the left more scrap wire, dismantled fake flower, bottle cap, plastic skull ring, seed beads and some Halloween clearance black stars.  The other is a plastic scorpion, tiny rhinestones, external tooth lock washers and spent (not live) primers*.

*Unless you or someone near and dear to you reloads their own ammo, you probably wont be familiar with these. This is redneck crafting right here folks.  I do clean them before using them for crafting purposes.


The left is napkin again but this time with an overlay of thread.  I've used string, yarn, jute, but never thread.  It seems so thin and insubstantial I never considered it.  Again the inspiration came from Marta, I was really impressed by her use of thread.  My example is not so impressive.  Yes my thread usage adds texture and interest, but I realized afterwards what I like about her method. First she randomly adds texture paste or thick gesso over the thread. Secondly she uses inks to add color and its that combination of bleeding and wicking that really makes it look phenomenal.  

The right side is paper towel, as opposed to the previous paper napkin.  It is thicker and the texture more defined.  


Here they are finished.  The left is another glass marble, this time over an image from an Oriental Trading Co. magazine.  Buttons, fun fur yarn, and thin macramé cord are also used.  The right is more flower pieces, scrap wire, a bead cap and plastic spider.  The spider was first painted with a mixture of dried tea (from the tea bag used previously) and black paint.


I chose the most boring neutral samples I had, in case this project was a complete bust, so the backs needed a little sprucing up too. 


Both of these were painted black and then the paint was removed with a paper towel before it completely dried.  I like how the same technique had very different results by scrunching the paper towel differently and using different pressure.   


The sample on the left already had an interesting texture, so I just highlighted it with black.  The right-hand one is finger painting.  


Here the left-hand side was painted by dabbing the surface with a cotton ball covered in paint. I thought the cotton would stick and come off in bits, it didn't.  What it did do was create a very fine texture that looks similar to sandpaper in person.  The last one is my favorite. First paint was added and removed like the first two, but then around the edges I brushed on the paint mixed with tea leaves leftover from the spider.

So that's it. I got to play around with a lot of textures in a short amount of time.  Now I have an idea of what to expect applying them to other things and I have these mini samples to use for reference at my craft party.  

Friday, May 26, 2017

Creepy Felted Easter Eggs


This is the last post about Easter stuff, at least until next year.  I've already covered zombie bunnies, this time it's creepy eggs.  The color mix of wool is the same as the bunnies for the rotten flesh, blood and bone.
 
[One great thing about hiring a zombie hand model for a photo shoot is paying an hourly rate for just the hand.]  


For the brain I started with an egg shaped.  Then I alternately snake rolled and needled felted pieces of pink wool until I had a long rope of it.   I swirled it around the egg and tacked it on with a few pokes.  Then I mixed some red and black and poked it into the crevices.


The eye started off as just a white egg.  And then the magic wool fairies showed up.  I really don't know what happened, I didn't expect it to turn out this good. 


The bunny skull also started out as an egg.  I thought if the egg was very loosely felted I could just felt the features into it.  Maybe I should have built the skull up around the eye and nose sockets instead of just trying to hollow them out.  Also the egg being narrower on top didn't help.  Those eye sockets are felted rock hard. It's so hard, I broke a needle.  Maybe I could have cut into the sockets to make them deeper. I just decided to quit before I made things worse. Oh well, better luck next time and I'm sure I learned something from the process even if I haven't quite figured out what it is yet. 

Thursday, December 1, 2016

The Creepmas Creature Rises Again!

Part man, part beast, part shrubbery, part goddess, no one really knows what it is or where it comes from.  Some say it was the product of an unwholesome union between a hodag, a bigfoot and a Christmas tree.  Others say it was forged during The Great Battle when Christmas merchandise was unwisely placed next to Halloween items unjustly clearanced at the end of September. All that is known for sure is that it only comes out on the 1st of December to deliver goodies in celebration of the first day of Creepmas.

This year one of the area residents managed to capture this rare photo of the creature performing it's annual ritual. 


To learn more about the 13 Days of Creepmas click on this link or on the Creepy Santa badge in the upper right hand corner.  Be sure to check out the other participating Creeps. If you're curious about my Creepmas favorites, past and present check out my Creepmas board on Pinterest. 

This year's delightfully dreadful morsels were:

Zombie Bites - Cranberry Pistachio White Chocolate Truffles - It was the picture of the truffle with the bite out of it that got me thinking of zombies in the first place with all the lovely red and green bits.

I only made half the recipe because people can be quite hateful towards nuts and I'm not talking about people with allergies, although that would be understandable even if it's not the nut's fault really, but just people who don't like nuts and act like anytime they find nuts in their food it must be some sort of personal vendetta against them.

Half the recipe yielded 18 one tablespoon sized truffles. 

I didn't follow all the instructions. I thought they were more complicated than need be.  I put the chocolate, butter and cream together in a microwavable bowl, nuked it for 1 minute at 50% power, stirred until it was all mixed and then stirred in the extract.


Elf Brains - Instead of making my usual truffle brains, I made white chocolate coated Oreos, which is actually what the molds are made for.  I decided to use the peppermint flavored Oreos in the spirit of the holidays even though I don't know if they are gross or not. The kids liked them and said the peppermint flavor had also infused the chocolate coating. 


Corpse Hands - Peppermint Bark - I used 8oz of white chocolate, 4 tsp of crushed peppermint candy (Normally I use twice that, no reason why I didn't, just had a brain fart. They were fine, just had a very mild mint flavor.) and 6oz of semi-sweet chocolate to fill four molds.


Microwave white chocolate at 50% for 1 minute, stir microwave again at 50% for 40-60 seconds.  Stir until completely melted and stir in peppermint candy.  Divide amongst molds and chill.  Melt the semi-sweet chocolate and top the molds off.  Chill again. 


Grinch Cookies - Gooey Monster Eye Cookies - I saw these with all their eyeball and greeniness and knew they would be perfect for Creepmas. 

I find the smell of box cake mixes to be nauseating, but the kids liked these and that's all that matters. Using a 1.5 tablespoon scoop yielded 32 cookies.


I've never made any claims to having great cookie decorating skills, but if you look at them from the right angle and you squint a little bit, these cookies totally almost look just like the Grinch. 

The peanut gallery wanted to know why I was putting mustaches on the cookies. After that it was even harder for me to decorate because the cookies started talking to me in really bad French accents and making me laugh.

Oui oui mon cheri !

Friday, November 11, 2016

Craft Party 2016


This October marked the 9th year of official Halloween craft parties. It's a lot of crazy, but magic happens when you throw a bunch of people in with a bunch of stuff, stir in some glue and sprinkle on a little glitter.  I love seeing everyone feed off each others ideas. It's like being in a vortex of creative energy.

Sadly I didn't get pictures of everything.  I never do, there's so much happening at once, it's hard for me to keep up.

As we do every year, there were potion bottles.  Bottles with labels...

Both this poison label and the one in the first picture are from SpookShows.com. Life Renewal Potion label from Love Manor.

bottles without...


The bottle below is one of my favorites, staring at the line between the light and dark red was like looking off into the horizon of a red alien landscape. 
Someone said it looked like a core sample from Mars. 


Last year we discovered that if you add glitter to a bottle of water
with a little oil in it the glitter sticks to the oil and takes on
a globular life of it's own when you shake it around. 


This bottle is kind of neat because there is too much glitter for the oil to hold,
so it has both the globular effect and loose glitter falling down when shaken. 


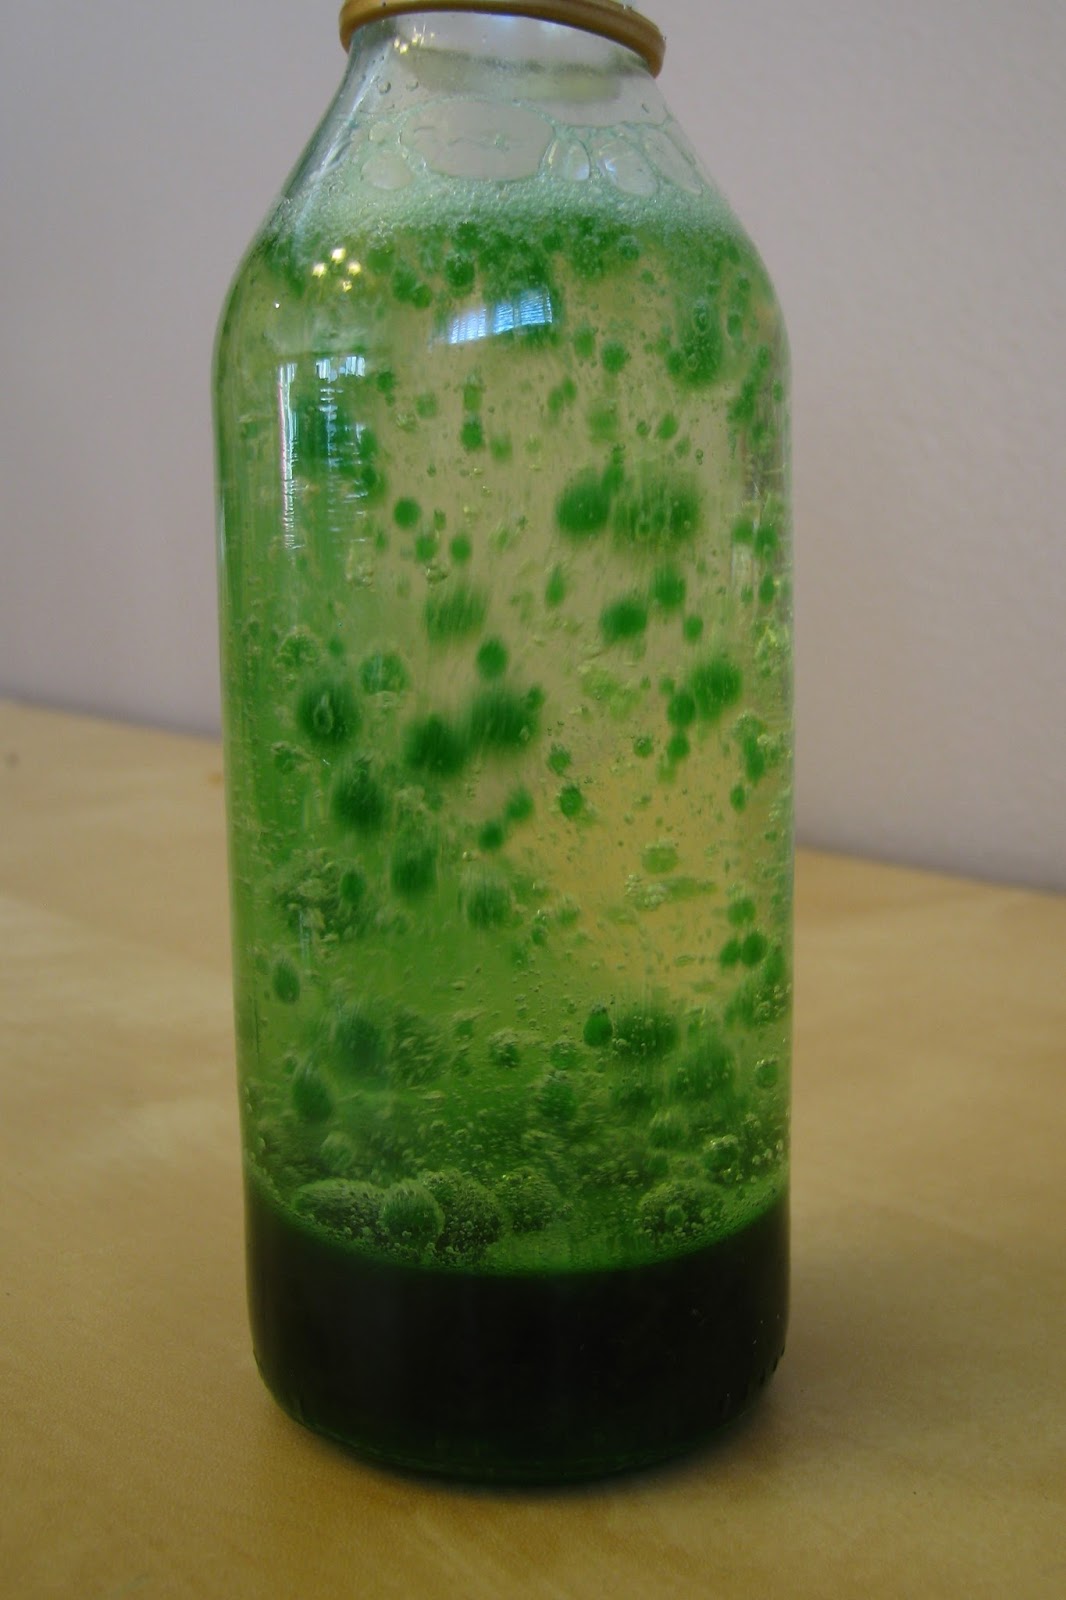
We also did lava lamp style bottles, which are a lot of oil
and a little water with alka seltzer tablets thrown in.
I wouldn't recommend adding glitter to these, it ruins the effect.


We used both corn oil and baby oil. 
Corn oil is cheaper, but yellow and baby oil is clear.

This one is pretty as is, but I wish I had a picture of when it was just plain water,
baby oil and silver glitter.  It almost looked like a storm cloud in a bottle. 


This year I made vampire blood.  Which is super cool, green under normal light, but glows red under UV. I used kale as they did in the instructions, but it's noted that anything green and leafy should work.

I have never eaten kale and after this I probably never will. Just blanching it for a minute smelled really bad, like old broccoli and even after pureeing the crap out of it the solid matter was really fibrous. It was not attractive. I'm just mentioning this in case you think you're going to tempt kids over to the dark side of kale by showing them how "cool" it is.  Cool, it is.  Edible, I think not. 


Anyway moving on, what to do with it? I tried lighting the "blood" from within with a submersible UV tea light.  It needed to be watered down so much for the light to come through that the effect is pretty blah.  Pictured above is full strength vamp blood on the left and watered down on the right, being lit from a source outside the containers. It's just a little strobe UV light, so it was hard getting a good picture. 


I kept the fibrous muck after I strained it out, because that stuff is cool too.  The chunky stuff isn't as bright, but this picture still doesn't do it justice. After it dried, it glow a bit less, but still enough to look cool.  Once it dried it didn't stink, it smelled a lot like alfalfa.


You can write or draw with the liquid and that looks cool too, but I don't have pictures.  Again it fades as it dries.  Maybe mixing with an acrylic glaze would help? Definitely need to experiment more. Like these glowing cupcakes from PhotoandGrime.com that use the chlorophyll from mint. Betcha mint smells better than kale.  I wonder if you can make minty vamp blood mojitos? Ok I definitely have to get down to the laboratory.  Igor? Where's an Igor when you need one?


I've been wanting to do papier mache at the party for awhile, but that's not a project that can be finished in a few hours.  So as a compromise, just to get some techniques introduced, we did simple stuff that people could at least get the foundation laid and then paint it on their own once it was dried. Here are some fantastic books my neighbor did. 

Here's a cute little pumpkin and some eyes before painting. Both are done on pieces of cardboard.  The eyes are glass gems over iris printouts from Orestesgraphics.com


And some random glass gems over magazine cutouts. 


I've been wanting to make tampon ghosts for ages, but the kids were so young I held off.  You can't really traumatize them if they don't get the joke.  But now that most them are in middle school, I figure the only thing worse than going through puberty would be tampon crafting with your mom. 

Tampons and I go way back, to when I was in middle school.  You know when dinosaurs roamed the earth and mullets and parachute pants were cool. In all that time I never noticed that they are made up of a bunch of really short fibers that fall apart when you futz with them. It may be unnecessary but I spray them with a little starch for longevity.  A clear acrylic spray would probably work well too. If you would like to read more about tampon construction than you ever really wanted to know check out my tampon angel.

I didn't want to add spraying starch as a parlor game inside my house, so for the party we just dipped them in starch.  A little liquid goes along way, so quick dips. My friend had the genius idea to wet the ends with the watered down glitter glue we had for potion bottles and then took it one step further to drop food coloring on the bottoms and let it wick up. Next time I would skip the starch and go straight to the watery glitter glue or maybe brush starch on the top and glitter glue the bottoms. 


I was inspired by her ghosts to make this tampon Cthulhu,
which I will write up a tutorial for, because everyone should
have a super absorbent Great Old One in their life.


The past few years voodoo dolls have been a party favorite. 
The girls love making fashionable outfits for them, so when I saw these ladies at Grandin Road, I thought we could do a similar thing with mini skeletons.


 They came up with some pretty amazing ideas. 


I was inspired to make this last skeleton while cleaning up after the party.  Scraps of this and that were laid out in such a way that the universe was practically begging for this to be made.  I started off with every intention of making a punk skeleton, but the scraps of pink neon lightning material (I have a friend who makes skate costumes, among other things, who donated some really neat stuff.), had other ideas and wouldn't leave me alone until I resigned to go 80's glam rock.

She's missing an arm because pre-party I played around with posing.  Soaking in boiling hot water was ok for minor manipulation. Snapping joints off and gluing into position looked the best, but leaves the joints very vulnerable, which is fine if you aren't going to mess with it much.  Obviously I messed too much and lost limbs along the way.      


We also made box mummies inspired by these but on a smaller scale.
Even though they look very similar we did things differently enough that I'll write up a separate tutorial. 


We did more foam bats this year too. 
Add a wire and you can stick them with your plants. 


We also made witch jars and other silhouette luminaries
No pictures but last year's post has pictures and links to silhouettes we used.


Food.  I'm obligated on penalty of death or at least torture by being tied to the tree of woe and licked by fire kittens to make rat and eyeballs every year. 
This year I went with diseased rat.  He did a fantastic job of oozing raspberry blood, I was very pleased.


I also made cookie dough brains, making the full cookie dough recipe without the cupcakes resulted in about 40 dough balls, which took about 16oz of white chocolate to coat enough molds.  These numbers are approximate because my kitchen is infested with ninja trolls that steal dough balls when I'm not looking. I made intestines, another recipe I'll have to post, and I tried these jalapeno mummy poppers, with a few modifications.  Instead of scallions and garlic, I seasoned them with chipotle powder and instead of salt & pepper I used a chipotle sea salt blend. The jalapeno's were a nice balance to all the sweet stuff. 


Guest contributions included Bat Barf, a meaty queso dip.  I didn't get a picture, but it was very barfy looking.  I did snap a picture of the tag, which makes me giggle, like only emoji barf can do.


On the sweeter side there were eyeballs,


bones,


witches hats and broomsticks,


graveyard cupcakes,


acorns,


and candy corn.


There's also a part that no one else gets to see. When the party's done, when it's quiet, when I can finally process everything...that's when I get some of the best ideas and I owe them all to the wonderful people who choose to share this day with me.