Thursday, November 14, 2013

Craft Party 2013


Just getting around to sharing a few pictures from this year’s craft party. It actually takes place the 1st or 2nd weekend of October every year. I generally suck at remembering to take pictures, but each year I try to suck a little less.

I love watching creativity spread like a mutant virus, seeing ideas take hold and twist and contort into something different with each new mind they infect. 
 
 
Much like what happened with this pretty little ghost, that was inspired by ghosts that we had hanging around, that were inspired by our toilet paper roll mummies that were inspired by other tp mummies on the internet, that worried the cat, that killed the rat, that ate the malt, that lay in the house that Jack built. 
 
 
These awesome heads were inspired by last year’s skull beads and in turn paved the way for voodoo dolls that hopefully I’ll get a tutorial of made soon.  
 
Here are a few more creations, unfortunately in the chaos I didn’t get around to photographing everything, so you won’t get to see the zombie arm or furry graveyard, among other things. 


This was the only potion bottle I got a picture of, but the glittered potions were a big hit this year.  This one doesn't contain any glitter glue, that's a couple of sticky eyeballs with glitter stuck to them.


I found this awesome Cthulhu coloring page at Yucca Flats, N.M. Be sure to check out the other coloring pages available.
 
 
I also had copies available of the FaceOff template from Skull-A-Day.  I was so close to the exhibit at the International Museum of Surgical Science this summer. But the day wasn't about me, and a little girl and her grandmother had a fabulous time at the American Girl Place where there was nary a skull to be seen, except for my skull bag. So I added a little skull appreciation into the party and my guests did not disappoint. Yes that last one has nose hairs. 

 
There were other skulls, which try as I may, I can not find the original source for and the ever popular dancing skeletons.


And more bead creatures...
 
We also gave out the best door prize ever this year, dried froggy roadkill. Of course I didn't get a picture of it, because I suck. 
Two summers ago the neighbor girls found a dried frog.  I think it's state had a lot to do with the drought that year.  It was almost in mint condition, all the bones were intact, the skin dried to a perfect froggy leather.  They were going from house to house showing off their find to gross out all the parents.  But to their surprise and why they were surprised I don't know, they know me better than that, instead of shrieks of disgust, I merely said, "Cool, can I have it when you're done with it?"  The darlings gifted it to me on the spot and no sooner had I put it in a jar than my husband piped up and said, "You're not bringing that in the house."  He thought it was going to rot and stink and attract bugs, he was very unreasonable and wouldn't even look to see how well preserved it was.  So I left it on the porch.  A few days later I went to admire it and it was gone.  It was a dark day in our marriage, I can't think of the last time we had such a heated argument prior and we haven't had another like it since.  The betrayal of having one's dead frog tossed in the trash, along with a very nice recycled jar, on a trash day no less with no chance of retrieval behind one's back is practically unforgivable.
This summer the girls found another frog. It was not in mint condition, it had been run over and then dried out on the blacktop, but still a very lovely gift.  I couldn't bear to go through all the turmoil and heartbreak again, so I decided the only thing better than having your own dried frog, is sharing a dried frog with friends. 
But the best part of this year's party was as people were leaving they were already talking about what they want to make next year.  That just warms my cockles*.  And not because I feel in some small way I’ve helped to facilitate a rich nurturing environment in which creativity can flourish.  No, it’s because the more people I get addicted to creepy crafts, the less crazy I seem. 
*A saying which doesn’t mean what it sounds like it should mean to my great disappointment, but I’m not one to let facts get in the way, so feel free to imagine my warmed cockles however you wish.

Sunday, October 20, 2013

Spiced Vines and Desert Graves

This is one of my daughters creations and I think she's stumbled on a few techniques that are worth recreating. 

Some friends donated their old spice jars complete with old spices to our cause.  Rather than dump the spices and just use the jars, I thought the kids would have fun using them to brew up their own  potion concoctions, which they did. My daughter also decided to use them for something else.


She spread glue on her paper and sprinkle on spices and herbs.  She added skeletons, bugs and piled on more spices.  Then she added more glue and more spices. For me it brings to mind shallow graves out in the desert, for her she just kept giggling about oatmeal and trying to get people to eat it. I have no idea, there was no oatmeal.  I love the way she used dried beans for eyes in the shrunken apple head, small corks in a sort of Frankenstein monster bolts kind of way and shoved the skeleton leg in its mouth, like it was devouring it.


It was a very fragrant project, at first it made me hungry for Indian food, but after awhile it became a little overwhelming. So I decided to take a few liberties with it, and transfer the contents to jars and that's when I noticed her spice vines.  The small seeds and herbs had attached to the lines of glue, and resembled leaves and the ground spices filled in the spaces to give it a dried vine appearance. 

This wouldn't be practical for a big project, but for these jar dioramas, it's a perfectly cool way to use up old spices. To recreate her vines I started with a plate covered with a layer of her spice mix, brown and orange ground spices with some small seeds and green herbs. On top of the spices I squeezed out lines of glue. I used Aleene's Fast Grab Tacky Glue. On top of that I sprinkle just the seeds and herbs. It's not important to completely cover the glue with them, but the ground spices stick the most so you want to make sure you get some seeds and herbs in the glue to get that vine effect. After you've sprinkled on the seeds and herbs, you can cover any white spaces with the spice mix and then let it dry.

For the demonic soul eating apple I poured some of the spice mixture in a jar and placed the items on top. I feel a little safer now that he's confined to a jar.  

For the other two I opted for a ship in the bottle look.  I cut sections from her paper the size of the bottom (side) of the jars. I added glue and spices to any bare areas on the paper. The skeletons were already glued in place from her original design. I just tweaked the bugs a little, lining them up along the middle and spacing them out and I also added some vine.  After dripping some glue down the inside of the bottle on what now would be the bottom, I rolled up the spiced paper like a long skinny skeleton taco and fed it through the opening.  It helped to have a long bamboo skewer to push the paper into place and reposition the insects. Then I added some more loose spices on top. 


The beetles were done the same way it was much easier because the bottle was shorter with a wider mouth. This was a very messy, pungent experience, but totally worth it.  All the bugs came from the "Big Bag of Bugs" available at Walgreens.  For cheap plastic bugs, they look really good in my opinion. 

Monday, October 14, 2013

Mr. & Mrs. Smith


Meet the newest addition to our toilet paper roll family, Peter & Madeline Smith. Named for the actors that played Dr. Frankenstein's monster and his love interest in Young Frankenstein.
I would  have assumed a monster would inherit its creator's surname, but in this case they prefer the anonymity. There tends to be a lot less angry villagers with pitchforks and open flames when the "Smith's" move into the neighborhood. 

For the body basics check out my TP Mummy

To give his shoes platform soles, I cut out two pairs of feet using the template and filled the space in-between with an inch wide loop of cereal box cardboard for support. Then I surrounded that with paper clay and after that dried, I applied a thin layer of air dry clay and used a comb to give it texture. After I painted it I applied an acrylic varnish.  I do foresee the possibility that the air dry clay could chip off, I'll just have to see. 

There is an awesome wolf head tutorial over at 102 Wicked Things To Do.  I'll pause while you go check it out.  Incredible isn't it?

There is some great advice on working with fake fur such as combing a part before you cut and making sure the fur is laying in the right direction.  Nothing earth shattering, but it's exactly the type of thing I wouldn't think of on my own until I was halfway through butchering a project.
Probably doesn't matter much for the few inches of fur I used, but I did follow her advice while working on Madeline's hair piece. 

Mrs. Smith's hair sections were stapled together wrong side out, the bottom edge was hot glued under and then I turn the whole thing right side out and tucked the top into itself. I just happened to have some black fur and a few scraps of white on hand, but I think she would look just as awesome with an updo of any kind of thickly textured fabric, like a heavy corduroy or cable knit.

Her eyelashes were a last minute touch, made of the same fun fur used for the dream catchers.  I like the way it looks and will definitely be pairing it up with googly eyes again in the future.

Update: To see the latest additions to the family check out Igor and Frankie

Saturday, October 12, 2013

Peanut Butter Eyeballs

 
There are better looking eyeball recipes out there, but these
are just as tasty, if not tastier and very easy to make.

For the record I don’t eat cardboard, but if I did, I suspect it would taste a lot like graham crackers, it just wouldn’t get as soggy in milk. I’ve tried quite a few different brands and haven’t found any that really taste good, but there’s enough sugar and peanut butter in this recipe to gloss over their shortcomings if you choose to use them. On the other hand, BelVita Golden Oat Breakfast Biscuits taste the way I imagine graham crackers wished they could taste. That is if they actually enjoy being eaten. Maybe resembling cardboard is just part of the graham cracker's natural defense against predators. 

 
Peanut Butter Eyeball Recipe

3/4 cup peanut butter
1/2 cup unsalted butter room temp
2 - 1.76oz packages of crushed BelVita Golden Oat Breakfast biscuits (can substitute 3/4 cup of crushed graham crackers)
2 cups powdered sugar
12 oz. white chocolate
20 red candy melts
M&M’s


Cream peanut butter and butter together and then mix in the crushed crackers. Finally mix in the powdered sugar, a half cup at a time. 

Refrigerate until its firm enough to work with and then scoop out the mixture using a small (2 tsp.) cookie scoop and roll into balls. I like to make an indent in the center of each ball so the M&M iris will sit a little lower. Refrigerate again, or if you want to work on them fairly soon pop them in the freezer for a few minutes.  


Microwave 6 oz. white chocolate for one minute in glass bowl. Let stand for a minute, then stir until smooth or microwave in additional 15 second increments if needed. Stir until slightly cooled and then coat half the balls. Place the coated balls indent side up on parchment or wax paper. Repeat with the remaining 6 oz. of white chocolate for the other half. 

Put the candy melts in the corner of a small plastic freezer bag. Freezer bags can take the heat and won't split a seam when you squeeze them. Microwave for 30 seconds, knead the candy melts to mix. Microwave another 30 seconds, and knead again until smooth, microwave an additional 15 seconds if necessary. 


Snip a tiny bit off the corner of the bag. Drizzle the candy melts every which way over the eyeballs. Not the veiniest veins that you will ever see on an edible eyeball, but it takes seconds to finish which is about a half second longer that it takes for these to disappear.  Once you have enough veins, squeeze a little red into each depression to glue on the M&M’s.  

Makes about 46.


I make these in advance and freeze them.  They do sweat a little right out of the freezer, but seriously they get eaten up so fast I don't think anyone cares. 

Here's a few labels I've used in the past so people know what they'll be biting into. The zombie font is Ghoulish by Sinister Fonts and the peanut butter font is Noises in the Attic by KC Fonts


Saturday, September 28, 2013

Finger Crayons


I had to pick up a few cleaning supplies and normally I walk right past the $1 bins of landfill fodder at Target, but I’m only human and when there is purple glow-in-the-dark dog poop shinning like a glorious beacon from heaven…well who could resist? But I shall save my praises of purple poop for a later post, this is about what was next to it. 

At first glance it looked like a silicone tray, which can be filled with broken crayons, tossed in the oven until crayons are melted and made into new interestingly shaped crayons. It’s been my experience that most of these new interesting shapes aren’t very conductive to coloring once you’ve matured past the scribble phase, so I was excited to see these finger molds which seemed like they might churn out more user friendly crayons.


At second glance, not that being in the $1 bin shouldn’t have been my first tip off, I realized this tray was more likely Silicone’s cheap trashy cousin and not Silicone at all. Not that I let that discourage me, it just meant a change of plan.

I didn’t think it would survive in the oven, even at a low temp. I could be wrong, but I have no intention of finding out. So after a little experimentation this is what I came up with. 
Not Pretty


I removed the crayon wrappers slitting down the side with an x-acto knife and sorted them by color. My first go around I layered colors which really detracted from the finger details, solid colors look best.

A heaping tablespoon of crushed crayon, which is about the equivalent of three crayons, was needed for each mold cavity. It really is a cheap mold and badly warped so it didn’t exactly fill level, some could have used a little more or a little less, but it's not like I'm getting graded on this.


I hammered the crayons between waxed freezer paper, so the smaller pieces would melt easier. If you don’t have enough of one color I suggest pairing it with one if its color wheel neighbors. Red’s with oranges, oranges with yellows, yellows with greens and so forth. 


To melt the crayons I half-filled a 6 oz. glass custard dish with hot water, dumped a heaping tablespoon of crushed crayon into a 3 oz. disposable plastic cup*, and placed the cup in the dish. Then I tightly covered them with plastic wrap to keep the plastic cup from floating up and tipping over.  

I poked a few holes in the top to vent, microwaved it for 45 seconds and let it stand for 2 minutes. 

Then I poured the molten wax into the mold and let it cool. Some of those with mixed colors I didn’t stir, which produced a mottled effect. I should have scrubbed the mold with hot water and a stiff brush in between batches because I got some color transference I didn’t want. 


Exhibit A
*These plastics cups** are not heat proof. See exhibit A.

I still used each cup multiple times because it seemed silly to waste a bunch of plastic while recycling. Despite being all warped and shrivelly, they worked fine. 

**I didn’t want to clean crayon off anything good, so I used what I had on hand.***

***These were left over from last year when I used them as jello molds for a lychee experiment. They looked good, if by good I mean looked like creepy eyeballs, but I didn’t care for the texture or flavor of the canned lychees. Only one person liked them, so will not ever be making again, but your mileage may vary.

Thursday, August 22, 2013

Halloween Dream Catcher


This is the tutorial that I used to learn how to make dream catchers, the step by step photos are very helpful.  The tutorial at  nativetech.org shows how to make one with grapevine, also worth reading is their origin of the dream catcher. Someday I'll have to make an old school dream catcher that actually looks like a spider web.

I recommend trying it once with the first method using a metal ring or embroidery hoop to learn the technique before you tackle the grapevine.  The grapevine is slightly trickier, it has some give, so it becomes really important to keep an even tension as you work your way around so the hoop doesn't get twisted. Also I find my yarn snags on the rough surface of the vine as I'm feeding it through. 

The main thing I do differently from the grapevine tutorial is to spray paint it black.  To further complicate things I like to use Fun Fur yarn. I'm honestly not sure why I think a spider web should be black and hairy, but I like the way it looks.  A smoother yarn or waxed cord would probably snag less.  It does become difficult to see what your doing when you get to the center, at that point I use a large eyed blunt needle instead of my fingers to work the yarn.  The good thing is all the wispy hairs help to camouflage any mistakes you make.

Besides using Halloween colors, skull pony beads (not pictured) add a nice touch.  I ordered a bag through the Oriental Trading Company years ago.  We use them for a number of projects and still haven't used them all. 

Of course no web is complete without a spider, and here is how I make mine

You can make dream catchers any size you'd like, but the smaller the hoop the more difficult it is to work. For really small dream catchers you could try using bangle bracelets with a thinner thread and for larger ones try hula hoops with a thick yarn. Using irrigation tubing you can not only make your own hula hoops, but you can make ginormous dream catchers. 

Here is an even easier version for kids at dream-catchers.org and there is also more information on their site about dream catchers.

One more website, real-dream-catchers.com shows a lot of different variations that I'll have to try in the future. 

Last I'd recommend the children's picture book Dreamcatcher by Audrey Osofsky.  It's beautiful in picture and verse. 

Update: For a wintry version check out the ones I did for Creepmas


Thursday, August 15, 2013

A Clockwork Orange Om Nom


To continue on my twisted Om Nom journey here he is to demonstrate that all you need to become A Clockwork Orange icon is a bowler and some false lashes. As always there's one in black and white one for you to color.

My favorite aspect of the movie was Malcolm McDowell’s eerily charming narrative which, among other things, haunts me still. But as melodic as Nadsat sounds from his lips, I prefer it in written form. For me reading Nadsat is like the Pop Rocks of brain candy, it kind of tickles.
 

Friday, August 9, 2013

Glittered Potions

At last year's craft party a few of the kids added glitter to their potions.  One friend remarked later that every day her daughters would give their potions a shake and watch them swirl around.  She suggested it would be even better if we could make the swirling effect last longer. 

I did a little digging and came across "calming jars".  The idea is that watching the swirling glitter slowly fall has a meditative effect. I saw them mostly in reference to calming toddlers, but I can get lost in the hypnotic sparkling swirls just as well as any three year old.

To make a calming jar you need a jar, water and glitter glue.  You can add food coloring or extra glitter.  Keep in mind the larger the glitter, the faster it falls. 

There are a lot of different recipes, 1 tablespoon glitter glue to 1 cup water seems to be pretty popular.  At the time all I had on hand were some half dried tubes and bottles of glitter glue.  It seemed wrong to go out and buy new glue, just to render it useless with a bunch of water, when I already had a stock of useless glue.  So I added hot water to what I had, let it sit for a few minutes to soften up, gave it a really good shake and voilà, magical shimmering water.   

Depending on how gummy and dried up the glitter glue is, you may need to repeat the process a few times to get all the glue out. For the little tubes it's easier to fill them if you twist off the tips, squeeze out all the air and then submerge them in a dish of water.  Once they refill put the tips and caps back on, shake and pour. You can add water weeks or months in advance and just let them sit, time will do all the hard work for you. I love finding uses for stuff that would otherwise just end up in the trash.   

I also tried a few adding a little white glue, I thought it might give a nice murky effect.  It didn't. It took a lot of food coloring to add color and the fine glitter just got lost in it.  I'll save watering down white glue for papier mache. 

I was curious about shelf life.  Now that my bottles are almost 10 months old, I bravely, with no regard to my personal safety gave them each the sniff test. The bottles that contained only tap water, glitter glue and glitter were fine.  Those that contained food coloring had a very dank dark cellar smell. Either food coloring doesn't play well with others, or Cthulhu has been peeing in my potion bottles again. 

My last words of wisdom are about bottles.  Any leak proof bottle will work for this project, but with kids in mind and the Halloween craft party right around the corner I really liked the single serving plastic wine bottles.  I had more fun filling multiple smaller bottles with different glitter combos than one big bottle. The one pictured on the left with the red food coloring and black glitter glue is my favorite.  I like plastic for the younger kids, but not so young that they're going to choke on the caps and I also just like the shape.  Normally I hate getting labels off plastic, but the two different brands that I've tried have thick vinyl labels that peel off easy and leave very little residue. 

By the way those little bottles of wine are great to have on hand for cooking, but using them that way takes a long time to save up a nice stock of bottles. I'm starting to think those mini liquor bottles would look cool too.  Would it be wrong if I plied my friends with cheap wine and liquor just get the bottles?   

Saturday, August 3, 2013

Skullified Footware

I've been hearing about how comfortable these sandals are. They've been my daughters choice of footwear for the past two summers, so when I saw a pair on sale I thought what the hell. 

I really am a function before fashion girl, but these were so blah, I had to do something.  If I've learned anything from my recent Bob the Builder adventure it's that everything can be dressed up with a few skulls.  I used a combination of Testors paint pens and Sharpies.

For the record I don't find them all that comfortable.  I am spoiled, I get to spend most of the summer barefoot, and it's hard to find anything more comfortable than that.  The nicest thing I can say is they are really easy to slip on when I do need footwear and of course now they look really cool. 

Sunday, July 28, 2013

Delightfully Twisted Artwork

I purchased this brilliant skull painting from a young, up and coming local artist.

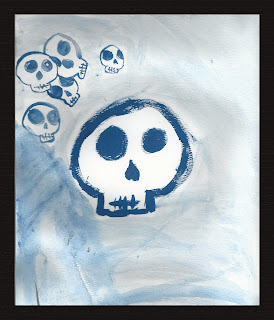
My daughter and her friend decided to have a sidewalk sale of their original watercolor paintings to benefit the Humane Society. My girl did the skulls just for me because she knew it would be an easy sale. Both of them did an incredible job planning, painting and setting up.

Their other works weren't nearly so dark, but I count myself lucky to have snatched up her friend's painting that I like to call "Not a Fan", because she said it's not a fan, it's abstract.  (But I can still see it spinning and the breeze blowing, which is a little weird if it's not a fan.)

I almost missed the big annual art fair downtown, which would've been a travesty. Not only were most of my favorite artists there, but I saw quite a few others for the first time that already I can't wait to see again and I came home with some amazing artwork.  I thought I'd share the artists that appeal to my warped nature.

HJMetalsmith.com - I love the creepy cool bugs, especially the praying mantis, but I can admit I also like the pretty butterflies and flowers.

Wagalabagala.com - I could get lost in the worlds he creates and am slowly amassing a collection so I can do just that.

MelvinMcgee.com - "Blue Band" is one of my favorites, it's like a mix of Blue Man Group and Dr. Seuss. "Alien Ark" is another one I just had to have. I love the brilliant colors, the humor and the out of this world experience his paintings give me. 

Juliadams.com - She had me with Memento Mobile a few years ago and I've been back for more every year since. 

ArtByTai.com - I liked his mutated Boba Fett, but it was the mixed media version of his frog grenade that I fell instantly in love with.  I didn't think it could get better than a zippered frog with Born to Kill sketched on his Kevlar, but it was aptly titled Full Metal Frog: Apocalypse Amphibian, which was the icing on the cake for me.

Eslingergallery.com - I love the eerie twists on my childhood icons. The Cheshire cat and the Grinch were always creepy, but it's like he's removed that thin veneer that kept us safe and sane. 

Atomic7studio.com - The wall of painted decks at his booth caught my eye. I've always felt like I'm walking into an art exhibit when I enter a skate shop and for a moment it was as if the reverse was true and then I was swept in by everything else he has to offer.

MadTatters.com - I love the 3D skull art and the paintings are fabulous.  You have to click on the blog link to see "Not a Sparrow Will Fall" by Ellie Rusinova

StanleyScott.com - Very dark, I really loved the ones that made me feel like I was walking into a metal vortex.

Dolangeiman.com - I love this Señorita. She was even more stunning in person.

EricHazeltineart.wordpress.com - He wasn't at the fair this year, but I saw him last year and hope to see him again.  I love his beautiful skull work. 

Monday, July 22, 2013

Toilet Paper Roll Mummy

This is my toilet paper roll mummy.
There are many like it, but this one is mine.

The two things that I've added that I don't see on most others is a rounded head and stable base.

For this mummy you will need:

Thin cardboard (cereal box)
White craft foam sheet
Toilet paper roll
Paper towels
Googly eyes (15mm)

Printer
Scissors
Glue
Tape (clear or white)


The first thing to do is cut strips.  For this I used paper towels, but you could use anything whitish and pliable that can be cut into strips.  Cheesecloth, muslin or old white T-shirts would all work well.

I like the Bounty select-a-size.  Each sheet is 11x6 inches.  You will need 4-5 of these cut into four strips each.  After the strips are cut crumple them into little balls to give them a little more texture.


Feet Template
 

Then make a template for the feet. You can skip this step if you're only making one, but you'll want to make more, so just make the template.

Just to make sure the scale is right, when printed the feet should measure 3 inches across the widest point.


Glue a rough cut of the template onto the cardboard and then cut along the outside edge of the line when it's dry.
 
If you plan on using this for a craft party and don't want someone gluing the template to their project thinking they found a pair of feet already cut out or for the template to accidentally get tossed during cleanup write "TEMPLATE" on it.  I speak from experience.
 
Then trace your template onto the white foam. 

 
 Cover the foam with a thin layer of strips. Tear them into smaller pieces, leave parts of them crumpled and twisted, but make sure all the folds are glued down well. After it dries trim around the edges. 

 
While waiting for the feet to dry, make the mummy body. Start with a toilet paper roll.  I prefer the brown ones, but if yours are white you might want to use paint or construction paper to darken a face area.  Create an "X" across one end of the roll with tape. Then loosely crumple 3 sheets of the aforementioned paper towels.  If yours are a different size or thickness you'll have to adjust. 
 
 
Gently stuff the tube with paper towels, until just a little dome sticks out the top.  This will be the mummy's head. Create another "X" over the dome with tape.


Lay a strip across the top of the mummy's head. Then cross another strip over the first, not quite perpendicular, so that you leave some room for the face. This lays down a nice layer of white, to build on. 
 
 
Next gently tie a strip around the middle of the tube to hold them in place. Then tie two more, one at the bottom and one at the top, staggering the ties so it's not all bulky on one side.  The reason I tie instead of glue is to be able to move things around.  Make sure the two strips from the previous step are where you want them and push them aside near the top to create a face area. 
 
 
To lay down the strips put a little dab of glue where you want to start and then just wrap them around every which way. Twisted, crumpled and messy gives it more character.  I use a dab of glue at the ends, maybe one in the middle, but I don't glue too much until I'm done.  Then I make my final adjustments and add glue anywhere that needs it.    The last step is to add the googly eyes and glue the body onto the foot base. 
 
Below are a few variations we've come up with using scraps of this and that. The bats were made by the kids in preschool. I have not made TP bats, but when I do I'll use the body style shown at Filth Wizardry.


Tuesday, July 2, 2013

Death Om Nom

 
The next addition in the Twisted Om Nom's is Death.   I don't draw much, almost never because I find it frustrating.  My abilities and my aspirations don't exactly see eye to eye.  I realize I'll never improve with that attitude, so these Om Nom's are my scary adventure outside of my comfort zone.  With each one I find out just how much I don't know, like how to draw draping cloth, but it's fun trying. If you've seen my  Sugar Skull Bunnies then you know I just recently discovered the world of converting sketches to line art following the basics of this video.  Death is my first attempt at trying to use the inking technique that's demonstrated in the video.  I think it does give the lines more character. I'm not sure how much I'll use it, but again it's fun trying new things. And here's one for you to color. 
 

My favorite Death is from Terry Pratchett’s Discworld series.  This is a great chart of how all the Discworld books are laid out.

My second favorite Death is from Neil Gaiman’s Sandman series.
I can’t mention the Grim Reaper without writing about my son’s brush with Death. Last fall one of the state parks hosted a night hike.  Little did we know as we set off, how close we would come to Death that evening. But on our way back to the main shelter we saw Him. Lurking amongst the groups of hikers, He never mingled or spoke a word, just silently skulked around the fringes.  No matter how hard people, however unwisely, tried to engage Him, He never broke character.
My son had taken a seat atop one of the picnic tables, when I notice Death approaching behind him.  Death sat down next to him and although my son started when he saw who his new bench mate was, he didn’t say a word.  He just scooted over a bit and then so did Death.  My son gave him a look as if to say, “What the heck?”, but still he remain silent and scooted over a bit more and Death followed. And that’s how it went with two silent figures in the dark, one inching closer each time the other moved away, and I the only witness to this seated dance with Death. Until, “Whumph!” Death and I looked over to see two feet sticking up in the air, my son had scooted right off the edge of the table.  Death looked momentarily surprised in so much as one can looked surprised behind a cloth mask. When my son's head popped up and we could tell he was alright, Death let out a bellowing laugh that shook his entire hulking form.  

Some may claim to have laughed in the face of Death, but so far as I know my son is the only person to have made Death laugh. 
This was also the same Death that inspired my daughter to get a costume last year, which she used for Creepmas and she aspires to be Little Death on the next hike.